A Very Jewish Summer Day 3: Camp Care Packages With Love

Welcome to Day 3 of A Very Jewish Summer! I know for many people summer evokes memories of Jewish summer camp and specifically sleep-away camp, your first adventure away from home.  Growing up in Southern Oregon, I never got to experience Jewish summer camp but having gone to college 3,000 miles from home, I know firsthand how much care packages from home mean.  My little one has a way to go before he heads off to camp by himself (though I am very excited we’ll be heading to Jewish family camp at the end of the summer!).  So, since I have several close friends whose kids will be at camp this year I decided to put together a combo of DIY and store-bought goodies to send them a little love from Mamaleh.

Personalized Camp Stationery

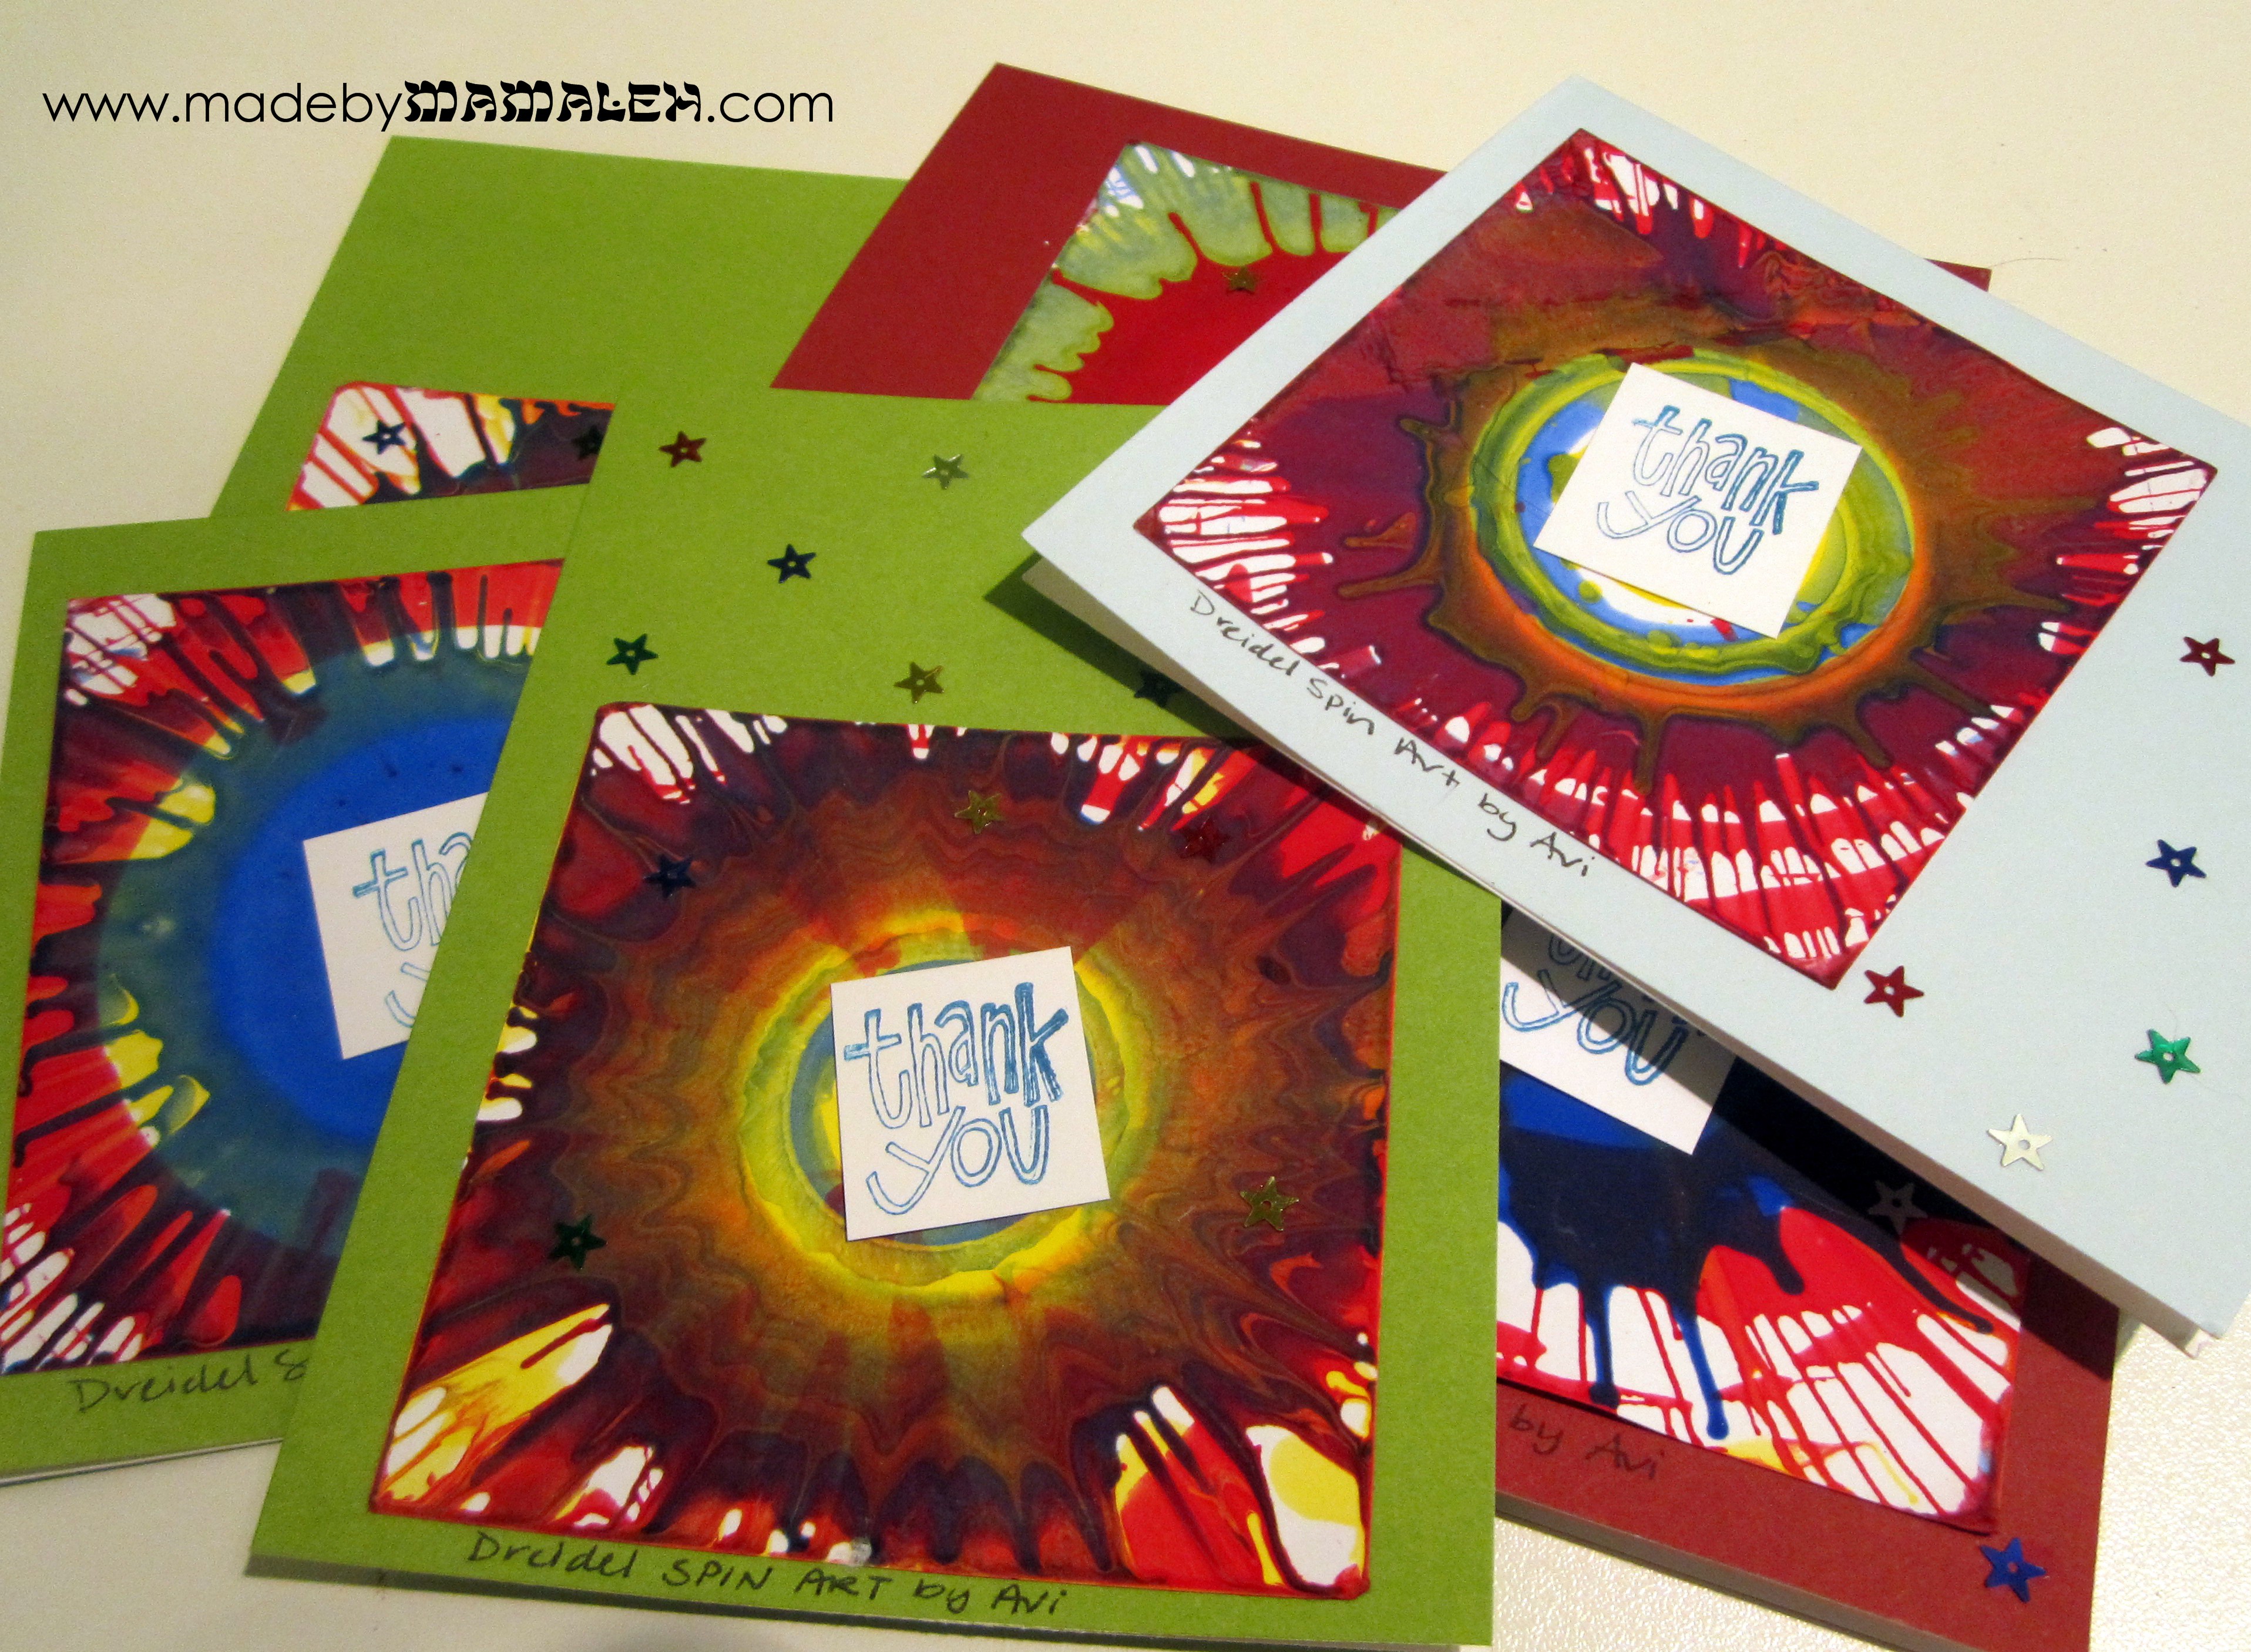
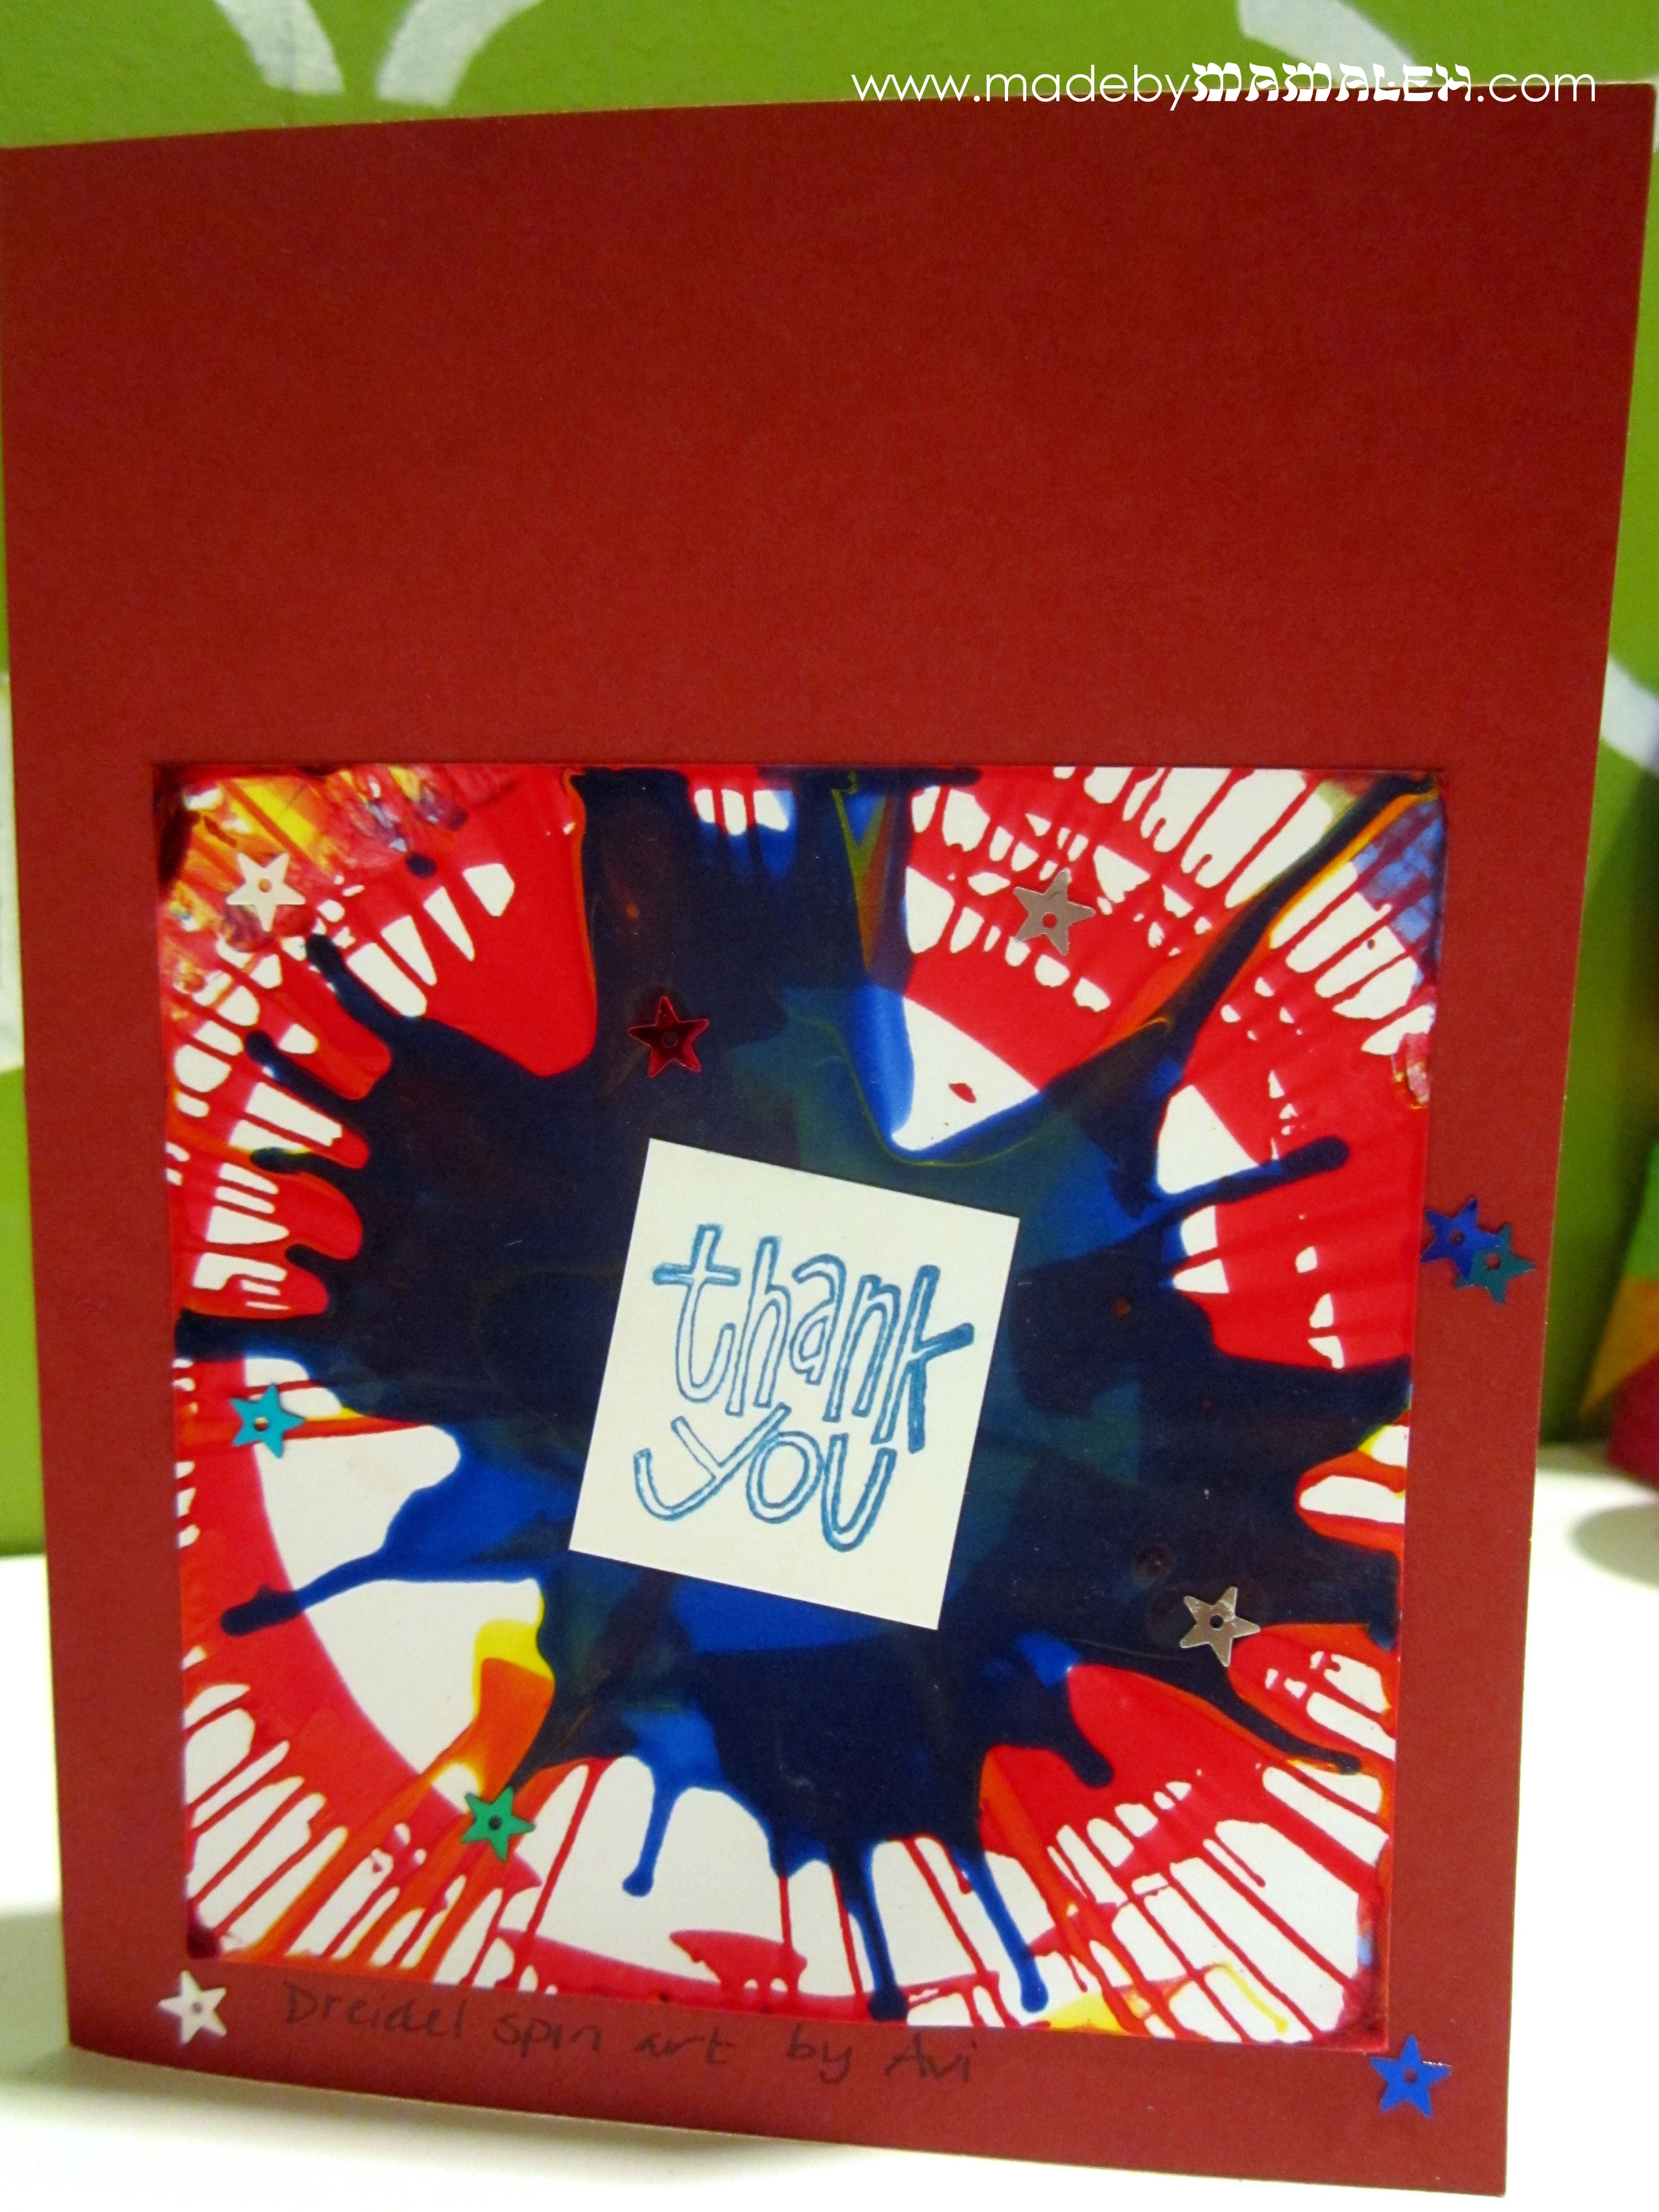
First, a little something to send some love back home (and maybe a thank you note to yours truly) : personalized stationery.  I realize we live in the era of email and text but I think there is nothing better than an old-fashioned letter or card.  I decided to give this a Jewish twist by including both English and Hebrew names on the cards.  Using Microsoft Publisher, I created my own custom A2 size (4.25″x5.5″) template and then created a text block at the top, inserting a little symbol in between the English and Hebrew.  (If you need help using hebrew fonts on your computer, or are looking for some stylish ones, check out my earlier post on the subject.) Then I printed these out on a variety of nice cardstock and cut the cards (by making them A2 size, you get 4 cards per 8 1/2 by 11 sheet of cardstock).  I even rounded the corners on some for a little something extra.

DIY Personalized Stationery

To finish off these sets, I paired them with basic A2 envelopes, cute kid-friendly stamps and matching little folders cut from this folder template using Silhouette Chipboard, layered with cardstock and then stamped and embellished with a little glitter glue.  A tip for the folders – be sure to let the glue set after gluing down the tabs on the sides by putting some pressure on it – I used binder clips which worked really well to hold it in place until it dried.  Last, I punched holes and tied them shut with a little piece of ribbon.

Personalized Stationery Set

Besides personalized stationery, I had visions of glow-in-the-dark kippahs for Shabbat and Havdallah under the night sky. This proved a bit trickier than I’d envisioned.  I started with some grey suede kippahs from bestkippah.com (I found this was one of the few places that allowed me to order a single dozen versus the several dozen often ordered for weddings and other mitzvahs).  My original plan was to try some glow-in-the-dark heat transfer vinyl  but it wouldn’t stick to the suede so using my Silhouette  for something more intricate was out.

DIY kippah

Next, I tried a glow in the dark fabric marker – it worked on my first test kippah (above) but when I went to try it again the next day, it didn’t want to write on the suede, not exactly sure why, it was almost as if the nap of the suede prevented it from writing properly.  Besides, it didn’t have the same glow factor as my third choice: glow-in-the-dark dimensional fabric paint.  This is a bit tricky to apply because you may get a few bubbles or globs as you are squeezing it but if you go slow, it’s not too bad.  Here are the kippahs I came up with (and yes, one is for a girl, gotta be egalitarian):

DIY glow-in-the-dark kippahs

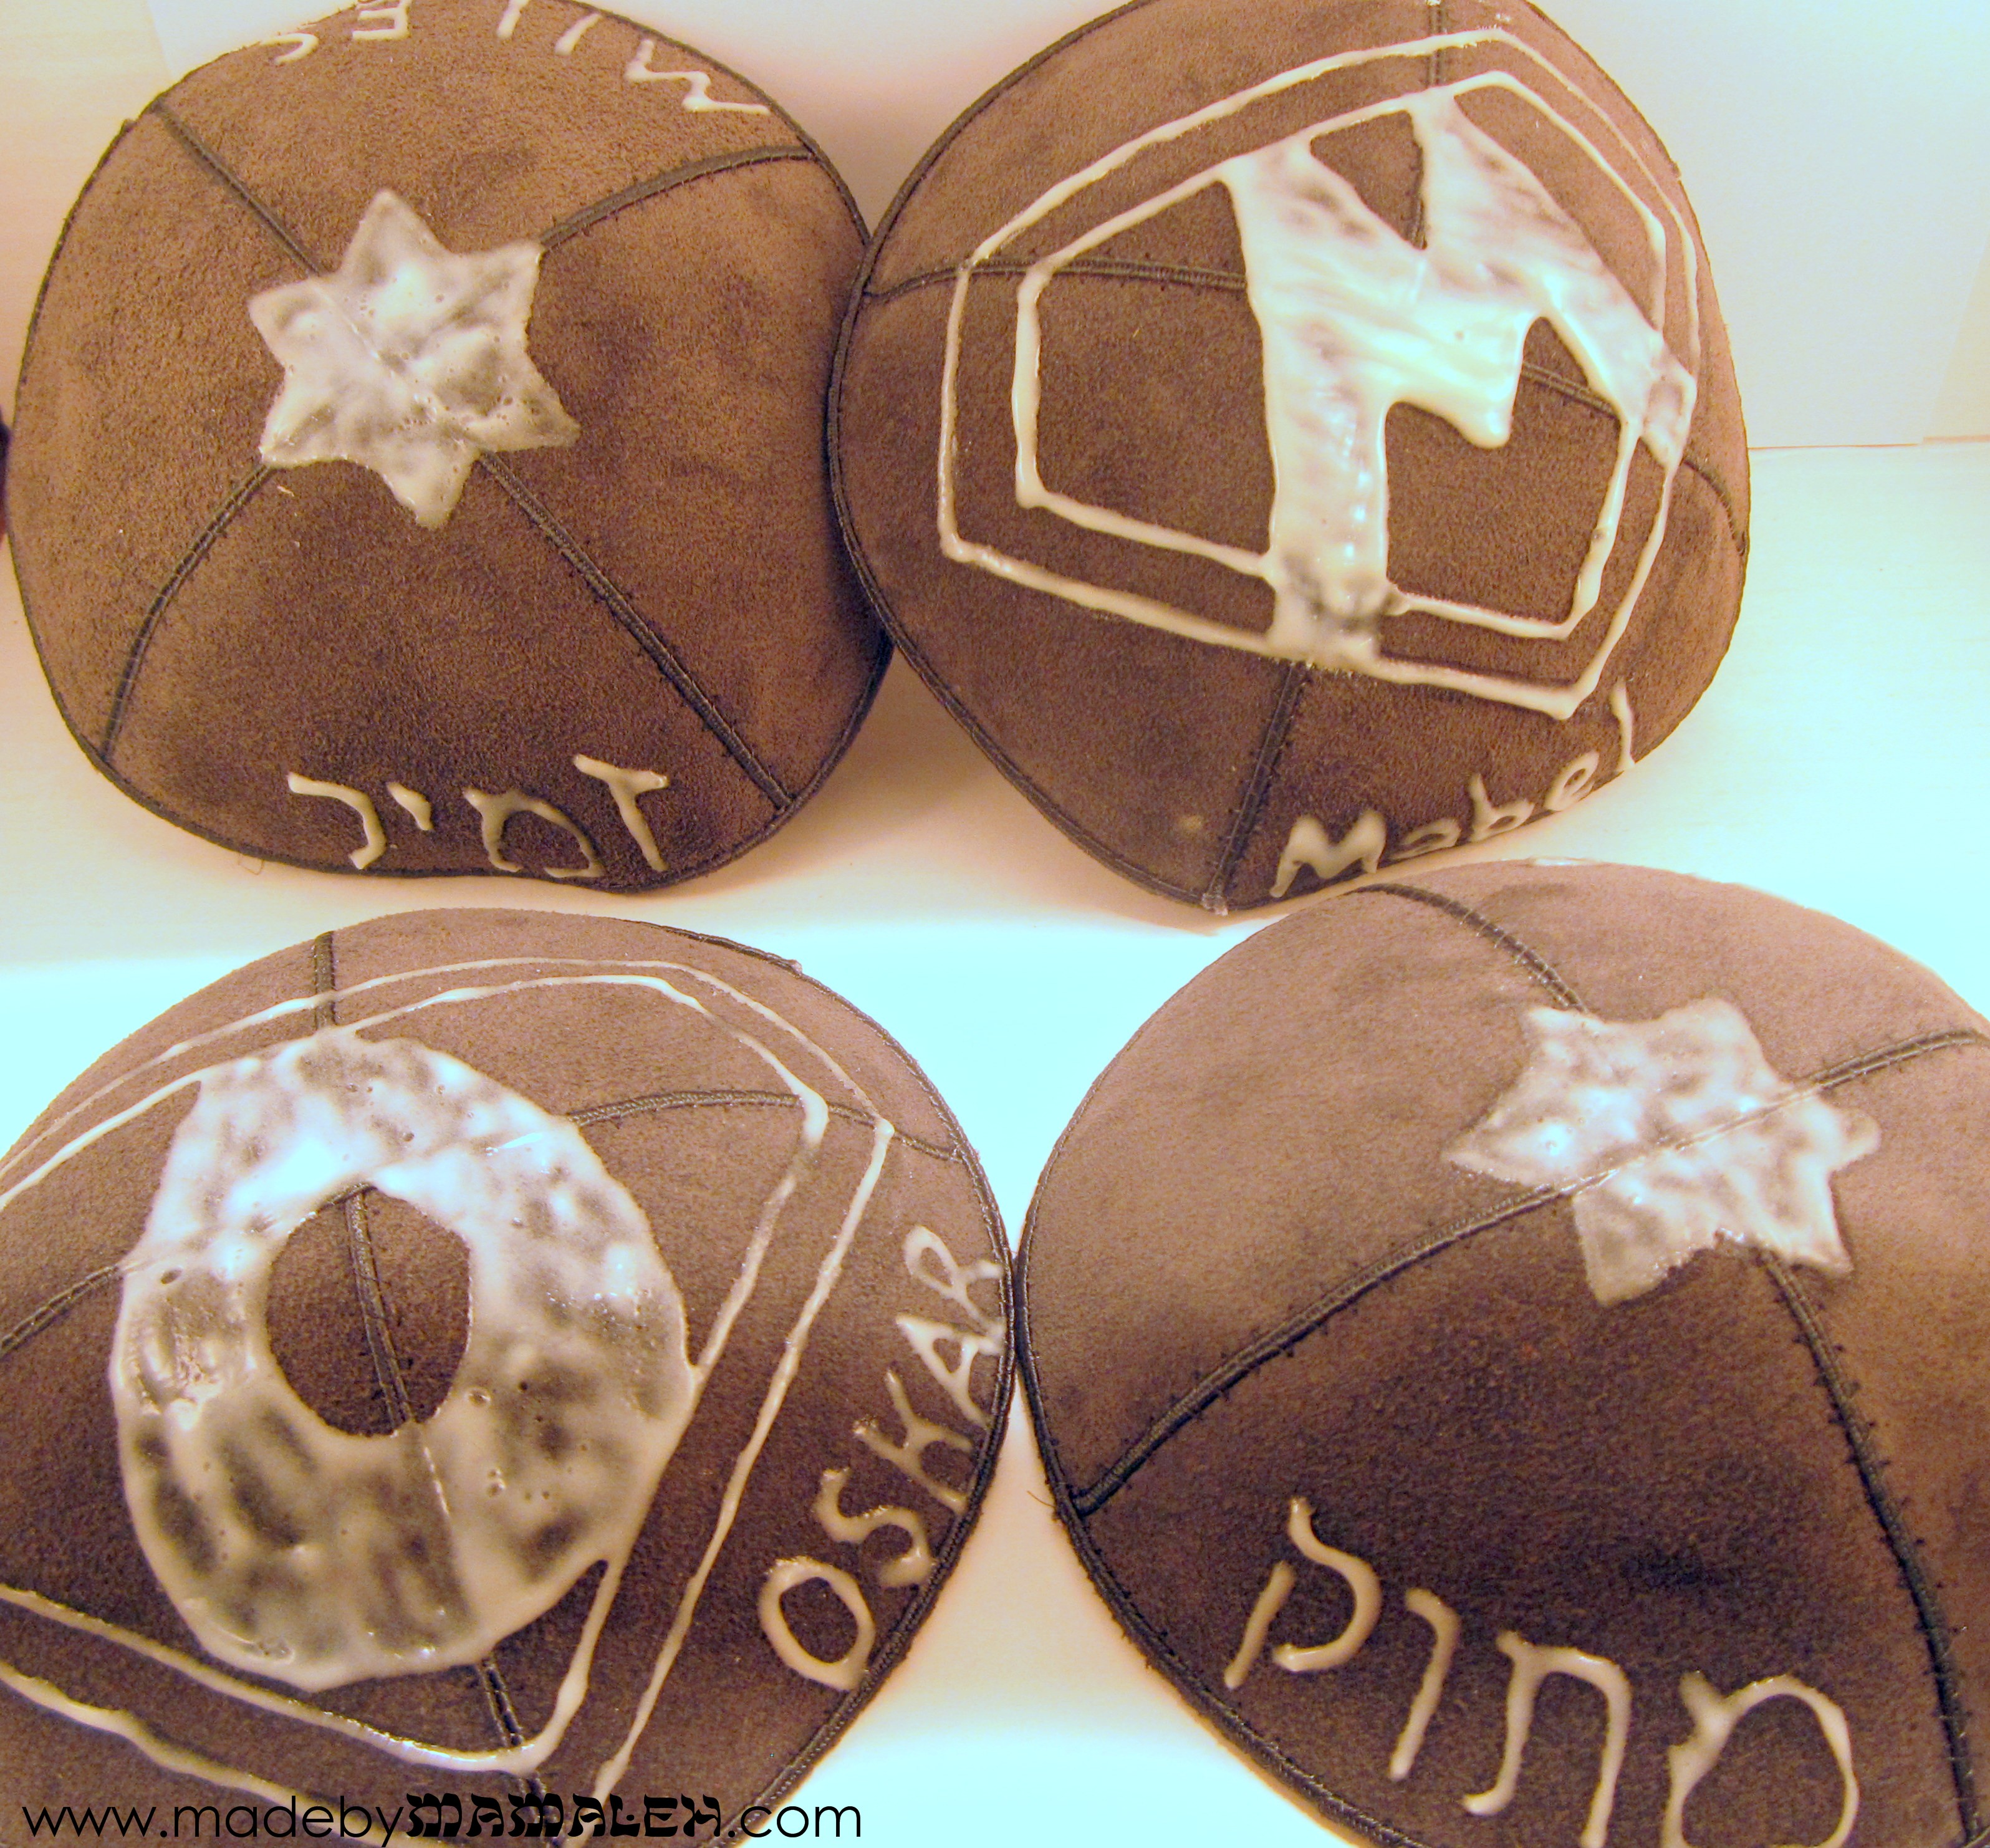
The result isn’t exactly what I was hoping for but I think it’s still fun and I am planning to go back over some areas to fill them in a bit more.  I know from experience that putting too thick a layer of dimensional paint can prevent it from properly drying so going back over it after it’s completely dry is definitely the way to go.  I also may keep my eye out for other colors of glow-paint to add a touch of color before I send these off.  Most importantly though, they definitely glow in the dark (I tried to get a photo of this but it proved way too difficult), so hopefully they will be a hit with these kiddos!

Finally, I did a lot of searching for just the right store-bought additions to these care packages, a little bit of something for everyone:

Camp Care Packages 
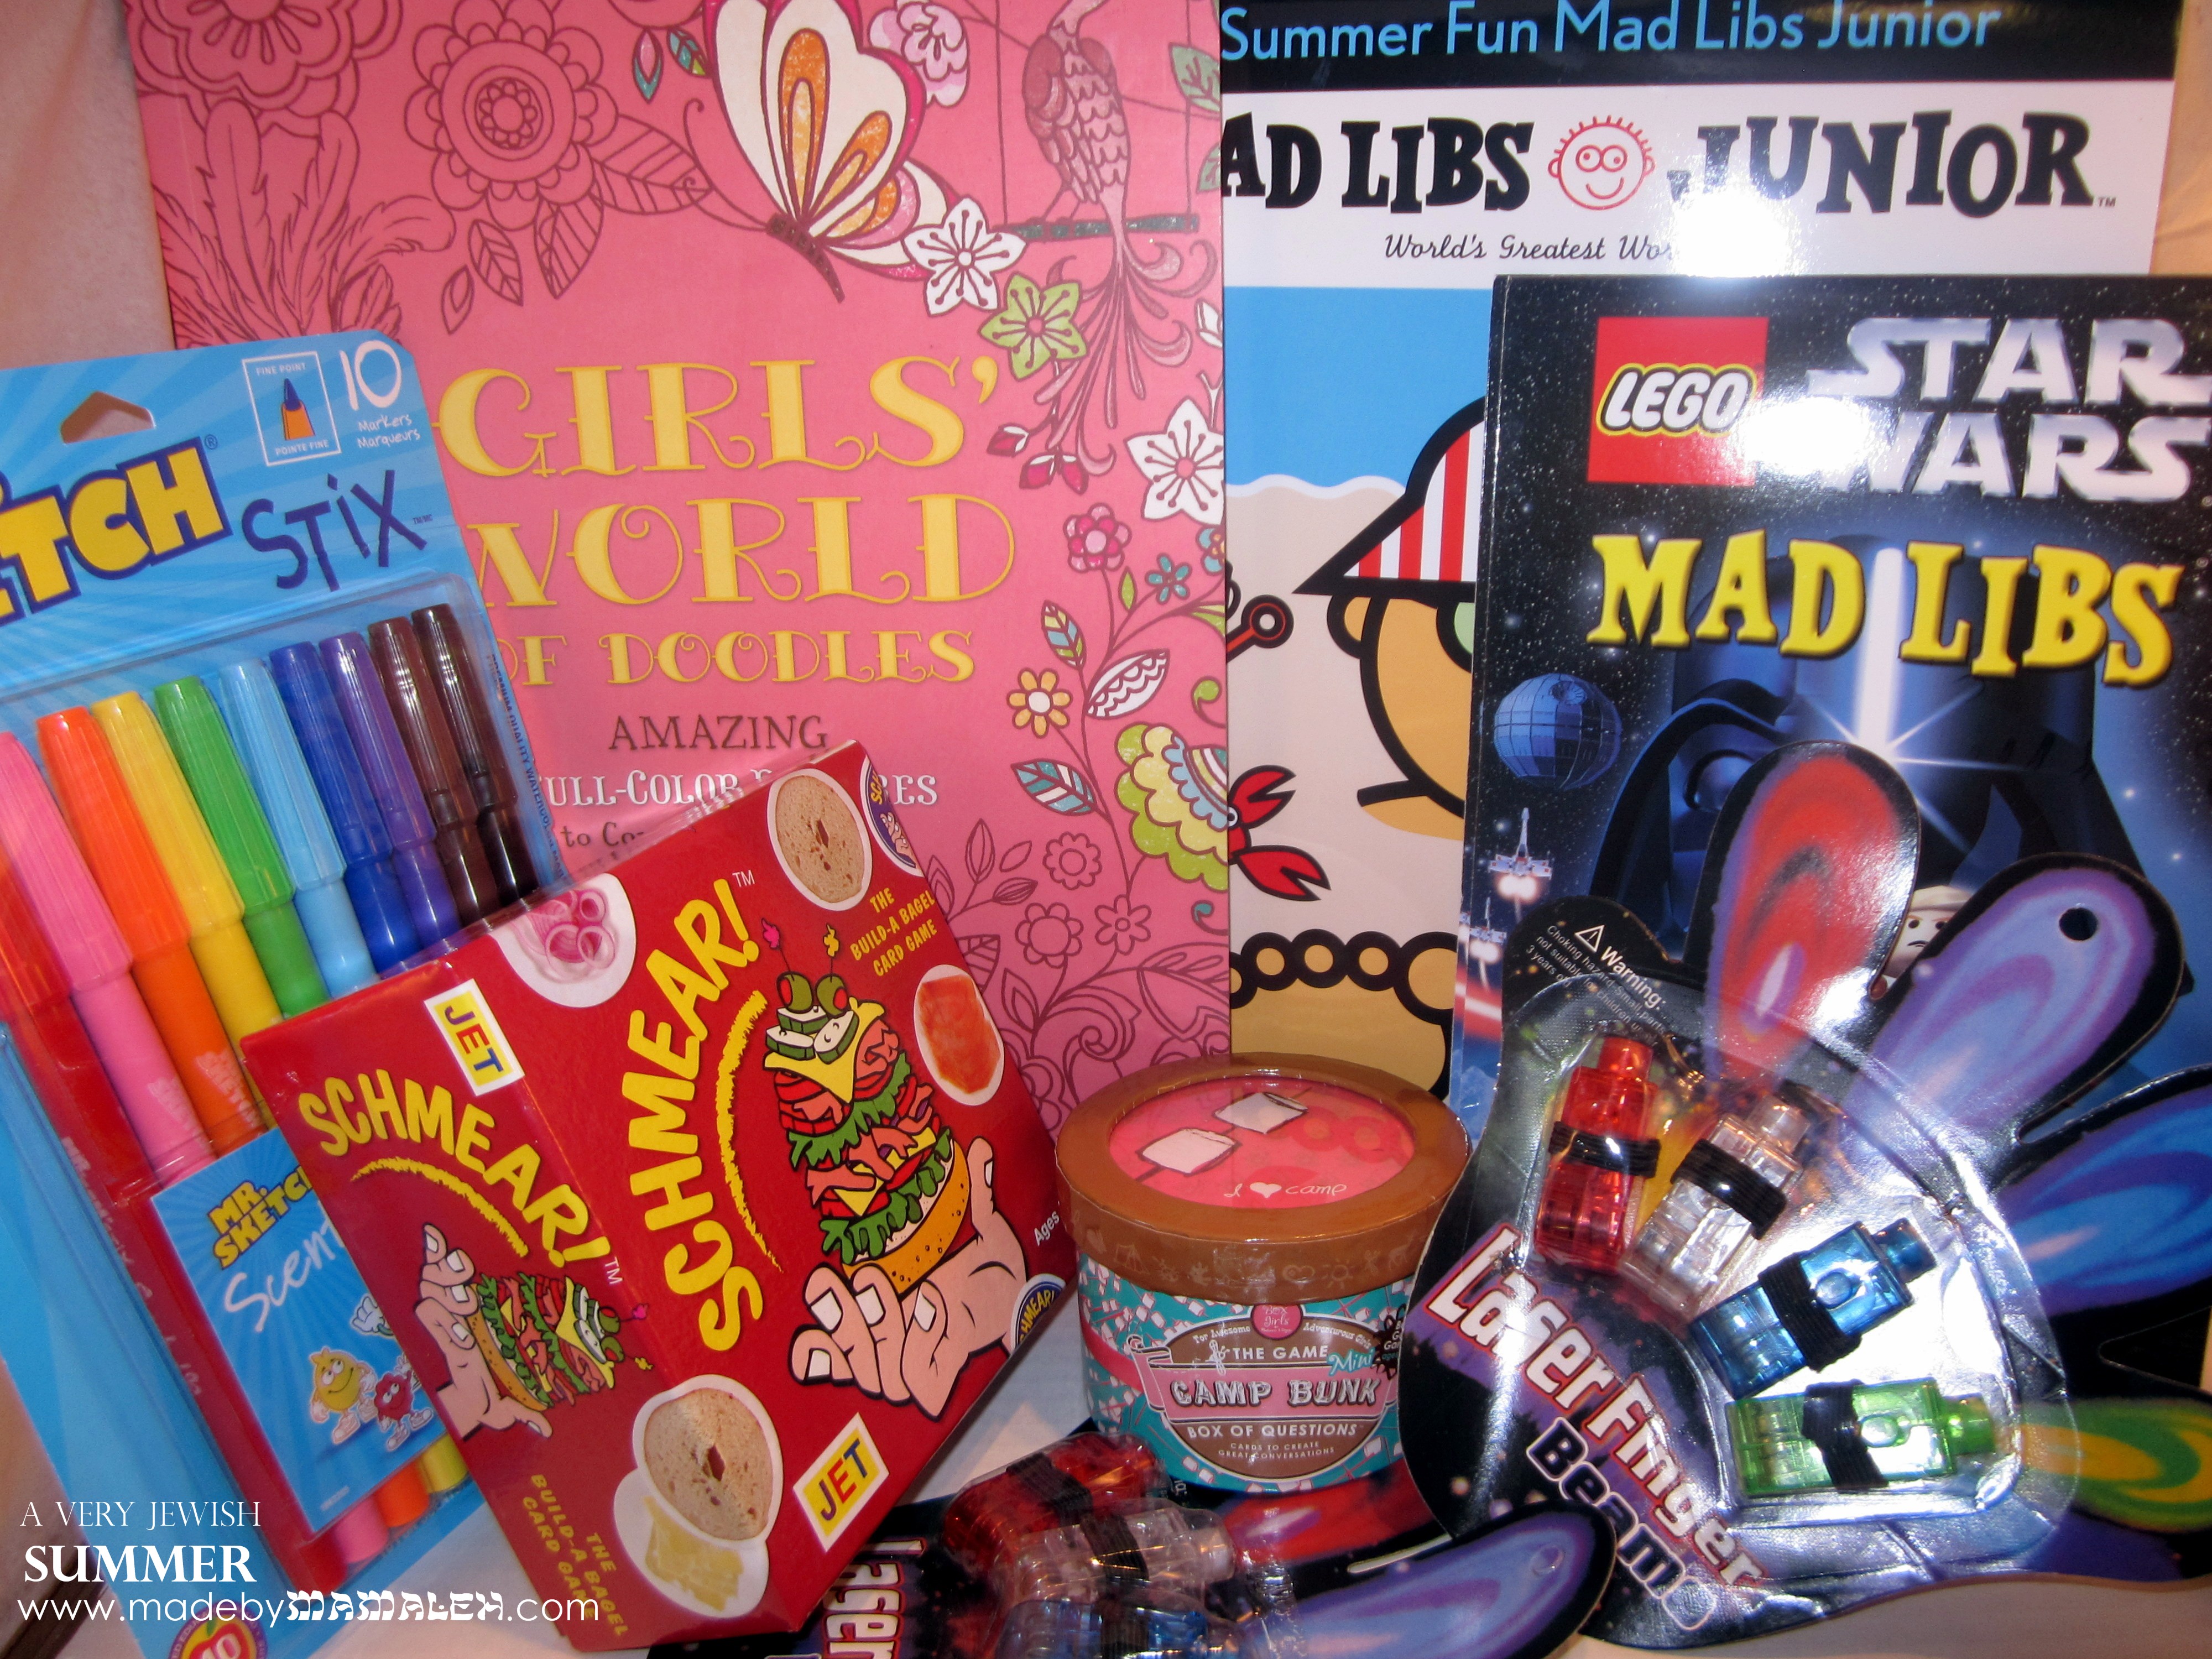
Mini Camp Bunk Box of Questions for some late night chit-chat fun; Girls World of Doodles – I must admit that I kinda wish I could keep this for myself just to spur my own creativity; Mr. Sketch Markers to use for doodling; Finger flashlights for late night reading or silliness, enough to share with the whole cabin; Mad Libs – these were one of my faves on long car trips so I figured they’d be great for camp as well: Lego Star Wars Mad Libs and Summer Fun Mad Libs Junior and finally the yiddish-named build-a-bagel card game Schmear which looks like a lot of fun!

Hope I’ve inspired you to be crafty and creative with your summer camp care packages this year.  If you aren’t feeling crafty or if you’re short on time, you can always opt to send one from somewhere that specializes in camp care packages like The Wrinkled Egg or Sealed With a Kiss.  One final thought, be sure to check what your camp’s care package policies are before sending – most don’t allow food and as a result will open things that are not obvious, hence I am not doing any sort of wrapping.  I can’t wait to pack up all of these goodies and send them off!  What about you? Are you planning on sending any care packages this summer?  What are you including?

That wraps up Day 3 of a A Very Jewish Summer, hope you are enjoying the party so far!  If you are just joining us for this blogging party, be sure to check out what you’ve missed so far –  we started out with the lovely dinosaur cookies by Yenta Mamas for a prehistoric Shabbat treat followed by a lovely Shabbat Alfresco tablescape by Chai & Home and tomorrow we’ll be treated to a yummy recipe from Busy in Brooklyn.  So stay tuned as a Very Jewish Summer continues!

Pesach is Coming Giveaway!

Oy!  Passover is less than a month away and I still haven’t recovered from all of our Purim fun just yet (and to add to that I have spent the day with a sick kid shuttling between doc and pharmacies). I can’t even pull it together to give you a little Purim costume recap/crafty info today (but for a quick preview check out my new FB profile pic.

But, I have a little something fun to help you start gearing up for Passover, particularly those of you with a little one arriving soon (or friends or family with a bub on the way). Ima Design Imports is back and would love to send one reader their adorable Baby’s 1st Passover onesie, perfect seder attire for your babe in arms or the perfect gift for the new addition to the family. To enter, all you must do is either 1) pin the image of the Baby’s First Passover bodysuit or 2) sign up for Ima Design Imports mailing list . Then, after you’ve done this, just leave a comment below.  Extra entries are available for each of the following (just be sure to leave a comment for each):

2) Subscribe to Made by Mamaleh via email or RSS
You have until 11:59 PM PST on Wednesday March 6th to enter.  Winner will be drawn at random.  Giveaway is only open to U.S. residents.  Good luck!
In the meantime, if you need some kid-friendly Passover ideas to start your Passover planning, check out last year’s A Very Toddler Passover.

Mini Mishloach Manot

Preschool Mischloach Manot for Purim

It’s time for Purim and we are really celebrating in our house this year!  We are kicking off things off with my son’s preschool parade (he goes to the JCC) today, then we’ve got our synagogue megillah reading (complete with super-hero theme) Saturday night and finally to top it all off our big temple carnival on Sunday!  I have one very excited 3 1/2 year old boy who’s been gearing up all week working on a grogger, hamantaschen and mishloach manot.

Now, as you know from my previous posts, I don’t have an issue with Jews choosing to celebrate Valentine’s Day and I myself love it.  But, I will admit that I was a bit surprised to find so many valentines in my child’s cubby at the JCC since the past couple of years it hasn’t really made an appearance and isn’t something the school recognizes.  I suspect this year’s increase was a combination of older sibs in public school, keeping up with peers and just a general desire to celebrate.  So, I decided that rather than join this trend, we’d give everyone a little something for Purim since, after all, it’s one of the holiday’s mitzvot to give gifts of food to friends.

Technically, the idea is to give food so that everyone has enough for a Purim feast but in essence, the idea is to share love and harmony and we are talking preschoolers here.  So, I decided to come up with my own mini mishloach manot (think class valentines meet Purim) that we could put in everyone’s cubby.  Now, I realize hamantaschen are the traditional Purim food and I do love me some tasty hamantaschen – for my fave recipe, check out Martha’s hamantaschen dough and add your favorite jams, lemon curd or cherry pie filling.  But, for this project I decided on bright, cheerful mini Unicorn pops.

Clear stamps for Purim

A while ago, I bought this great clear set from Amuse Art Stamps that just said Purim parade to me (note: the line is now discontinued, sorry).  I used these stamped simply in black ink on a variety of  3 1/2 x5 colored cardstock, wrote “Happy Purim!”, made a slit with my Exacto and then taped the lollipop to the card, making it look like the noisemaker being sounded by the little boy.  The perfect mini preschool mishloach manot!  Happy Purim!

Preschool Hand-stamped Mishloach Manot

Valentine’s Day: Mamaleh-style

We’ve said Happy New Year to the trees and are now contemplating Purim costumes but before we get there, it’s time for the red and pink heart-filled holiday of Valentine’s Day.  I realize in some Jewish circles celebrating (St.) Valentine’s Day is a no-no and even if it’s not, there are those who simply refuse to buy into a totally commercial holiday.  I fall into neither camp – to me, it’s just a nice excuse to remind folks we love ’em, combat the winter blahs with a little color and of course it’s a great excuse for a little card-making and/or shopping.  Some of my earliest memories are gluing down doilies and applying foiled red heart stickers to family valentines.

It is only fitting that throughout this post you will see the Hebrew word for love: ahava(אהבה).  Stay tuned for some homemade Valentine cards with this in mind as well.  But for now, in case you want to give your Valentine’s Day a little bit of a MOT twist, here are a few gift ideas (so just forward this link to the loves in your life if something strikes your fancy).

  • Keeping with the theme of Ahava, you could literally get some AHAVA, some of the best skin-care, straight from the Dead Sea.  Their hand cream is my fave!  They even have a nice men’s line for the guys in your life.

  • And for your friends still looking for their funny Valentine, you can always go with this from Modern Tribe. 🙂

Hopefully you now have a few unique MOT Valentine’s ideas for whoever you want to share a little love with (including yourself!)

Note: I was not compensated for this post in any way.  I don’t think any of these companies even know I exist (except for past purchases from some).  This is all just stuff I like and hope you do too 🙂

Dreidel Spin Art Thank You Notes

Dreidel Spin Art by Kiwi Crate

Ack!  Where has the time gone?  It’s already January 13th and we still haven’t finished our holiday thank yous (and Hanukkah was so early, it’s even worse)!  Oh well, I figure as long as they get ’em before Valentine’s Day, we’re in good shape and better late than never, right?  I was taught from a young age the importance of writing a nice note of thanks for a gift and I am trying to install the same in my son, Avi, even at age 3 1/2. One thing that I think helps make the process a bit more fun is to make the cards yourselves.  If you recall, we had a lot of fun doing the dreidel spin art from our Hanukkah Kiwi Crate back in December.  I saved all of those little paintings thinking they’d come in handy for something like thank you notes and sure enough they did.

Hanukkah thank you note

The process was simple and kid-friendly.  Starting with some nice colored A2 notecards from Memory Box (I get all mine at Impress in Seattle), Avi and I used a glue stick to glue down the paintings.  After gluing them we put them under a stack of books to help them lay flat.  Meanwhile we stamped “thank you” on some scrap white cardstock in turquoise and trimmed it up into cute little squares -I realized just how great my mini guillotine  paper cutter is for little hands (with adult help of course!)  Then we attached these using my favorite adhesive and finished off the look with some scattered star sequins glued on.  And to explain the art like any good artist’s print, I put a little handwritten “Dreidel Spin Art by Avi” under each of the paintings.  Absolutely perfect kid thank yous!

Hanukkah thank you notes from dreidel spin art

Random Acts of Kindness 2013

Happy New Year!

I am not really one for New Year’s resolutions.  I generally take stock of the more serious stuff at Rosh Hashanah and Yom Kippur. I am constantly trying to keep on track with Weight Watchers and the gym so there’s really no resolution to be had in that department either, I just keep on keepin’ on.  Last year, my goal for the secular new year was to try one new recipe a week and give my neglected cookbook collection a workout.  I tracked this for a while and then slowly stopped writing it down but did keep some of the momentum going throughout the year so overall I’d say it was a success.

As 2012 came to a close and I filled in my new birthday calendar (I printed out an awesome 11×17 one from Lemon Squeezy), I was originally thinking my goal for 2013 was simply to mail old-fashioned snail mail cards for people’s birthdays and anniversaries.  It’d definitely be an improvement to the Facebook birthday wishes that everyone seems to have defaulted to these days but still, it’s sort of expected.  So, I am upping the ante – not only will I remember these special days but I will also commit more simply random acts of kindness this year since the best cards or treats are the ones that are completely unexpected.  A couple of months ago my friend Samantha sent me the cutest card just to say thanks for being her workout buddy and give me some encouragement – it made my day if not my week.  So, for 2013, I want to spread some of that kindness and cheer.

For my first random act, I decided it was the perfect excuse to pull out my brand-new Cup of Wishes stamps by Mama Elephant.

I stamped the cup and tea bag on some animal print paper using my Versafine Onyx Black and then carefully cut it out.  Then I stamped the Warm and Thoughts using VersaMagic Cloud White to get that steamy effect on a plum-colored A Muse notecard and rounded the corners.  Then I attached the cup using foam squares and tied a little ribbon on the top.  Now all I need to do is throw in a little Starbucks card  (I still have a few of the Mini Moments cards that are perfect for this endeavor) and I am all set to commit random act #1.  Now the only question is who will be the recipient…

What about you?  Any resolutions or fun endeavors for 2013?

The last lights of Hanukkah 2012

As Hanukkah 2012 draws to a close, I want to share one final Hanukkah project with you.   As you are probably painfully aware, finding a Christmas T-shirt or pajamas (or anything) for kids is so easy but Hanukkah-wise, you’ll be lucky to find anything.  Last year, I lucked out and found a “Dreidel Champion” T-shirt by Carter’s.  This year, armed with my trusty Silhouette, I decided to make my own using simple Ts from Old Navy and a variety of vinyl.

First up is my own version of the “Dreidel Champion” for a friend’s son:

Dreidel Champion 2012 t-shirt

Now, love or hate the whole princess thing, we all know it’s popular with preschool girls.  So, I decided why not embrace it and give it a new twist by creating a Dreidel Princess!  For this shirt I used a combo of plain, glitter and flocked heat transfer vinyl as well as rhinestones of course.  Next year I may need an adult version…

DIY Hanukkah shirt for girl

I had bought some purple foil star of david ribbon on one of my 1-800-Dreidel shopping trips and couldn’t resist the chance to use it for a matching bow.  A little hot glue and a pony tail holder and I was in business.

DIY Star of David hair bow

Finally, for my own mini-mensch, I’d planned to do a collage of numbers since counting is rather popular in our house at the moment but he informed me that he wanted a menorah so a menorah he got.  Using gold glitter vinyl and several shades of blue in plain and flocked, I created this “8 Crazy Nights” shirt.

8 Crazy Nights t-shirt

He absolutely loved it (he wore it more than once!).  I just can’t resist the chance to show off his Hanukkah (and all around) cuteness.  Hope your Hanukkah was as full of sheer joy as mine!

8 Crazy Nights Hanukkah t-shirt

As Hanukkah reminds us of the miracle of light,  there are so many positive ways that we can channel our collective feelings of  sorrow surrounding the Newtown tragedy.  My heart aches for the families and I wanted to share one outlet that speaks to my creative side.  One of my favorite crafty blogs, Damask Love  has created a very special project to inspire healing through creativity.  Check it out if you are looking for a non-traditional way to help.

Hanukkah crafting from Kiwi Crate! Ima Design winner!

I have to admit – I’m generally not one to purchase pre-fab crafting kits; I have hoards of craft supplies so if I want to make something, I generally only need to get a couple items.  But when Kiwi Crate contacted me and asked if I’d like to try out their Handmade Hanukkah kit, I figured why not.  I’m always open to try something new.

Kiwi Crate is a children’s creativity company, targeted for kids ages 3-7.  They offer monthly subscription activity boxes as well as special projects like the Hanukkah box.  Each crate is filled with enriching & engaging kid-tested projects which cover a range of developmental areas and subjects, including art, science, and imaginative play.

The box arrived nicely wrapped in brown packing paper with a big Kiwi Crate logo and addressed directly to my son (which was a big hit of course).  This was a nice touch in the age of elaborate, difficult to open packaging; no box cutters were needed, so my son could open it himself.

When my son managed to rip the paper off, we found the darling little Kiwi Crate Box filled directions and the makings for two Hanukkah projects: a tissue paper covered menorah (battery operated) and dreidel spin art.

Speaking of the directions, they are fantastic!  Being a crafty mamaleh, I probably could have gotten by without them. But for those less craftily inclined, the details and pictures make the projects easy.  I imagine that they’d be great for kids of reading-age too.

We decided to start with the menorah.  The materials included candle holder, tissue paper, glittery Mod Podge with tray, foam brush, shamash holder,  foam for the shamash, and LED flicker candles.  The process itself was simple albeit a little messy.  It was my first time using glitter Mod Podge and I found myself daydreaming about what grown-up projects I might be able to use it for as it was just pure sparkly goodness.  I will say though that my three-year old’s attention span waned after about 2 candle holders so I was left to finish the rest on my own.  I do think that makes for a project which could easily be shared by multiple kids – I sort of wished we’d invited friends to do it with us.  It wasn’t until the menorah was all dry, that my son regained interest when it came time to “light” the “candles.” I must say, it’s pretty cute and fun and will be a nice, non-fire hazard menorah to use for the holiday.

Tissue Paper Battery Menorah from Kiwi Crate

Next up was the dreidel spin art and I gotta say this was super fun for both of us! But oy, was it messy!  Be sure to put on smocks and do it on a drop cloth of some sort (we used a coated tablecloth on the floor).  You use the included plain wood dreidel and pre-cut pieces of paper to do spin art in the Kiwi Crate box.  I loved how many pieces of paper were included – ample enough for 2 or 3 kids to do a bunch.  And when you’re done, there are Hebrew letter stickers included for the dreidel to restore its traditional Hanukkah role. My only wish was that the box had been a bit taller since the paint splatter definitely went over the sides (to its credit, it did wash off pretty easily).

The resulting art is really fun and unique.  Perhaps we’ll use them to create Hanukkah gift thank you notes by putting them on a notecard and adding some stamped cardstock on top to cover the hole.

Overall, I was pleasantly surprised with the Kiwi Crate.  As an avid crafter who generally likes to do my own thing, it was sort of nice to be given direction.  Along those same lines, it was nice to not have to worry about my son destroying my own supplies to do his project. Everything we needed was included in the box which I think is excellent way to help people who feel intimidated when they go to a store like Michael’s or Joann. Even I get overwhelmed at those stores with the variety of supplies and tools available. I think Kiwi Crates are creative and fun gift ideas; I may have to order a few for friends.

Oh and I almost forgot, the winner of the Ima Design contest is #1, Jamie.  Look for an email with details!

Note: I was not financially compensated for this post. I received a Hanukkah Kiwi Crate free for review purposes. The opinions are completely my own based on my and my son’s experience.

Fit for a Princess!

And the Wine Charm Giveaway Winner!

We had another 3rd birthday party to go to this past weekend, a princess themed one to be exact.  So, I thought I’d use it as a chance to have a little more fun with T-shirt vinyl and rhinestones and make the birthday girl her own, very personalized tee.

I started with a cute girls’ tee from Old Navy – I’d show it to you but it’s not on their website anymore – why are plain kids’ tees so hard to find?!  Then, I used the rhinestone template I created when working on my Queen Farmer Hat.  Well, to be precise, I used the first template I created that was too big for the hat 🙂

Silhouette rhinestone remplate

I wanted to jazz it up a bit more so I free-handed a heart in the center and later aded pink jewels to the points.

Princess crown iron on

Next I cut the word “Princess” out of pink glitter heat transfer using Silhouette Studio and the font Lavanderia Sturdy.  I went with the lighter Lavanderia Regular and Lilac vinyl for the princess’ name.  Then, I laid everything out on the shirt using a clear ruler to get things just so.

Then I carefully ironed each piece on one at a time, finishing with the crown so it would sit on top of the words in a few spots.  The final result was just as I’d hoped it would be – fit for a princess!

And finally, the winner of the Shabbat Wine Charm giveaway is…Tina David Konegan!  Mazel tov Tina!  Email me your address so I can get your prize in the mail!