Until this year, I’d never made challah before. Of course I love to eat it but the thought of making it totally intimidated me (probably because I remember one attempt by my mom when I was a kid did not resemble challah at all, sorry, mom). In an attempt to cook more and put my cookbook library to good use, I challenged myself at the beginning of the year to try one new recipe a week. For the most part I’ve kept up with the challenge, some weeks cooking less and some more. But, what I’ve found is that trying different challah recipes has played a big role in the challenge and I’ve figured out that making challah really isn’t so scary and actually the process is rather therapeutic after a hectic week.
As I mentioned the other week, I love The Challah Blog as it has lots of fun innovative challah ideas and fantastic tutorials for braiding. But, so far my go-to challah recipe has been derived from Tante B’s “Famous Challah.” I’ve made my own addition to the glaze and also simplified her process since I am lazy efficient and like to rely heavily on my trusty Kitchen-Aid. In fact my Kitchen-Aid has gotten such a workout since the beginning of the year that my husband had to replace the grease inside (that has made it work even better and at some point, I’d be happy to share how he did it).
This recipe has worked really well every time I’ve made it at home (Seattle). But, I even tried it in the desert (Las Vegas) where I was told bread just doesn’t rise right and it turned out great. It’s not very eggy as far as challah goes but it is quite delicious, especially with the hint of honey on top. So, if the idea of making your own challah scares you, I promise, it’s a lot easier than it looks so give it a try one of these days. Happy baking!
Ingredients for 2 large challot:
7 cups of all-purpose flour
2 packages or 4 ½ teaspoon of dry yeast
2 eggs (1 for dough, 1 for glaze)
½ cup vegetable oil
1 Tablespoon salt
½ cup sugar
2 cups warm water
Honey to taste (for glaze – I love the specialty NW honeys available like blackberry)
PAM or extra vegetable oil (for bowl)
Directions:
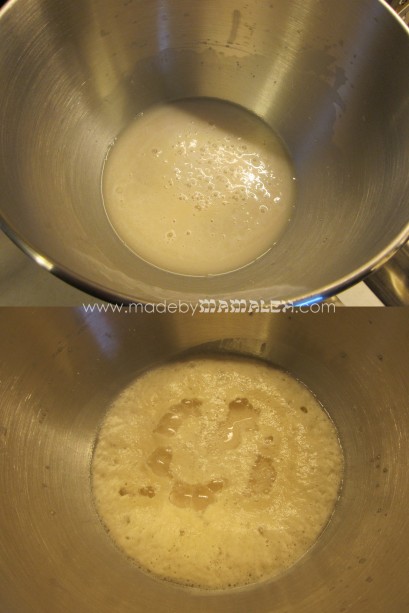
1. In bowl of stand-mixer combine 1 Tablespoon sugar (removed from the ½ cup), 2 cups warm water and yeast.Let sit for roughly 10 minutes until the yeast has dissolved and is foamy. It should go from the top picture to the bottom in about 10 minutes.
2. Once yeast is nice and foamy, add the remaining sugar, salt and 3 ½ cups of flour. Mix using the bread hook.
3. Add egg and oil. Mix.
4. Add remaining 3 ½ cups of flour slowly and mix using bread hook.You may need to scrape the dough off the hook several times and put it back in the bowl. Keep mixing until the dough has formed a nice ball and springs back when pressed with your finger. If for some reason, it’s still too sticky, add a little flour.
5. Spray a bowl with PAM (you can also swirl veggie oil on the sides but I find PAM oh so easy) and put the dough in the bowl. Cover with Saran wrap and a dish towel and put somewhere warm to rise. If it’s cold out you can turn your oven on to 150 and then turn it off and put the bowl in there to rise. The dough will look like the picture on the top. After an hour (or more), it should look like the photo on the bottom.
6. When the dough has risen, give it a good punch down with your fists and then put it back to rise some more. Depending on how rough a week I’ve had, I may give it a second punch down but I haven’t found this critical in making this recipe work.
7. After 2 hours, turn dough onto silicone mat to roll out.
8. I use my hands to split the dough into two even sized balls – one ball for each loaf. If you want to make three smaller loaves, as I did last week, just split it into three.
9. Then with each of those balls, portion out the dough according to the number of braids you need. Here, I did 3-strand loaves but there are tons of options out there.
10. Roll out each little ball on the silicone mat being sure to work out any air pockets and then braid directly on baking sheet covered in either parchment or silicone baking mat using whatever braiding style you prefer. (I recently upgraded to an extra-large baking sheet that takes up my whole oven that can hold 2 large or 3 small loaves. Now I just need to find the right size silicone baking mat for it!)
11. Once the loaves are braided, cover them with a dish towel and let rise for 30 minutes.
12. Preheat oven to 375°F.
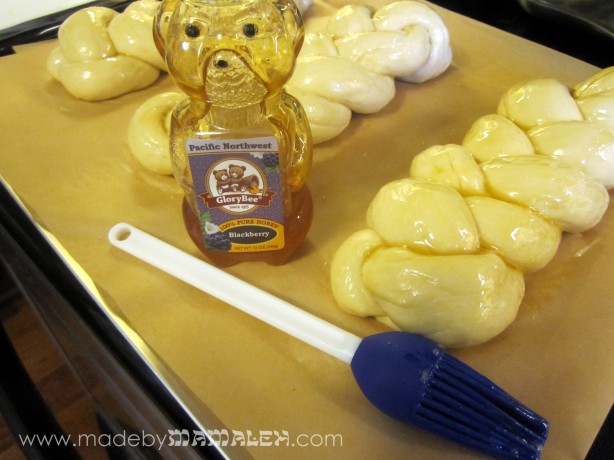
13. After allowing loaves to rise, beat remaining egg in bowl. Using silicone pastry brush, lightly brush over each challah. Then drizzle honey on top, to taste and also brush on using same silicone brush.
14. Bake for 25 minutes. Then, turn off oven allow the challah to sit in the oven for another 10 minutes.
15. Remove and allow to cool on rack. Enjoy!


Pingback: Challah at its eggiest (aka its best)! | madebymamaleh
Thanks for the shout-out! I have been looking for a few “bigger” batches so I’m definitely going to put yours on my list to try! Challah is such a rewarding baking project 🙂
LikeLike
maybe i’ll try this recipe on the weekend. always wanted to make challah
LikeLike