Happy 4th Night of Hanukkah! It seems like there has been a lot of discussion online lately on Hanukkah trying to compete with Christmas so let me just say, no, Hanukkah is NOT the Jewish Christmas. But, it does fall during the darkest time of year when everyone is just looking to add a little light and cheer to their life. So, why not get into the decorating spirit a bit? Last year as I looked through the latest Pottery Barn catalog, bummed by the limited Hanukkah offerings, I noticed these cute word stocking holders spelling out “JOY” and couldn’t help but think how festive they looked.

I wondered if there a Jewish word that would look equally cute and cheerful on my mantel to add a little fun to my menorah display? And then it came to me: “SHALOM.” Of course I had a vision for what it would look like and since that wasn’t available pre-fab, I would have to DIY.
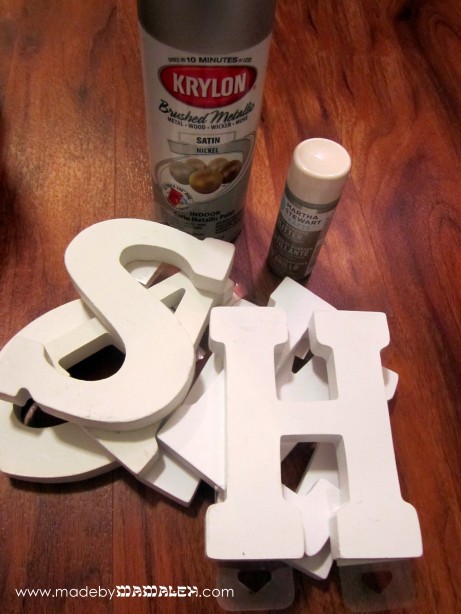
 I managed to find some nice white wood letters at Joann or Michael’s that stood nicely on their own. First, I removed all the labels – the ones I bought last year were a major pain and I had to use nail polish remover for the labels and pliers for the hang tags but the ones I got this year were much improved and the labels and tags came right off. I tried to just go straight to the glitter paint but quickly found that coverage wasn’t the solid look I was going for. So, next, I gave them a good coat of silver spray paint on all sides. Once the spray paint was dry, I used a foam brush to apply 2-3 coats of Martha Stewart Antique Silver Acrylic Paint to get a nice glittery coating. Here’s a picture of it on my mantel last Hanukkah (note the decorative glass dreidels scattered about too). This year the letters are a bit more spread out in a slightly different arrangement.
Now if only I could finish a set for my best friend before Hanukkah is over! But, even if I don’t, the beauty of the word “Shalom” though is that really you could use it for many (any?) Jewish holidays (I think it’d be especially nice for Passover) or even all year round. Since the letters are all separate, you can maneuver them to fit your other decor however you want!
Want to make a set for yourself? Or maybe you’ve been inspired to make something else? Well, as a little Hanukkah treat, I’m giving away a Michael’s gift card ($18 of course!). Just leave a comment here and tell me what crafty supplies you’d use it for by Sunday, December 16th at 6pm PST. Extra entries for 1) liking Made by Mamaleh on Facebook and/or 2) following the blog via email. Just leave an additional comment for each one. If you are already a follower then you automatically get extra entries (just be sure to leave comments for each). This giveaway is open to US residents only – sorry to my friends abroad!


