[Disclosure: This post contains Amazon affiliate links.]
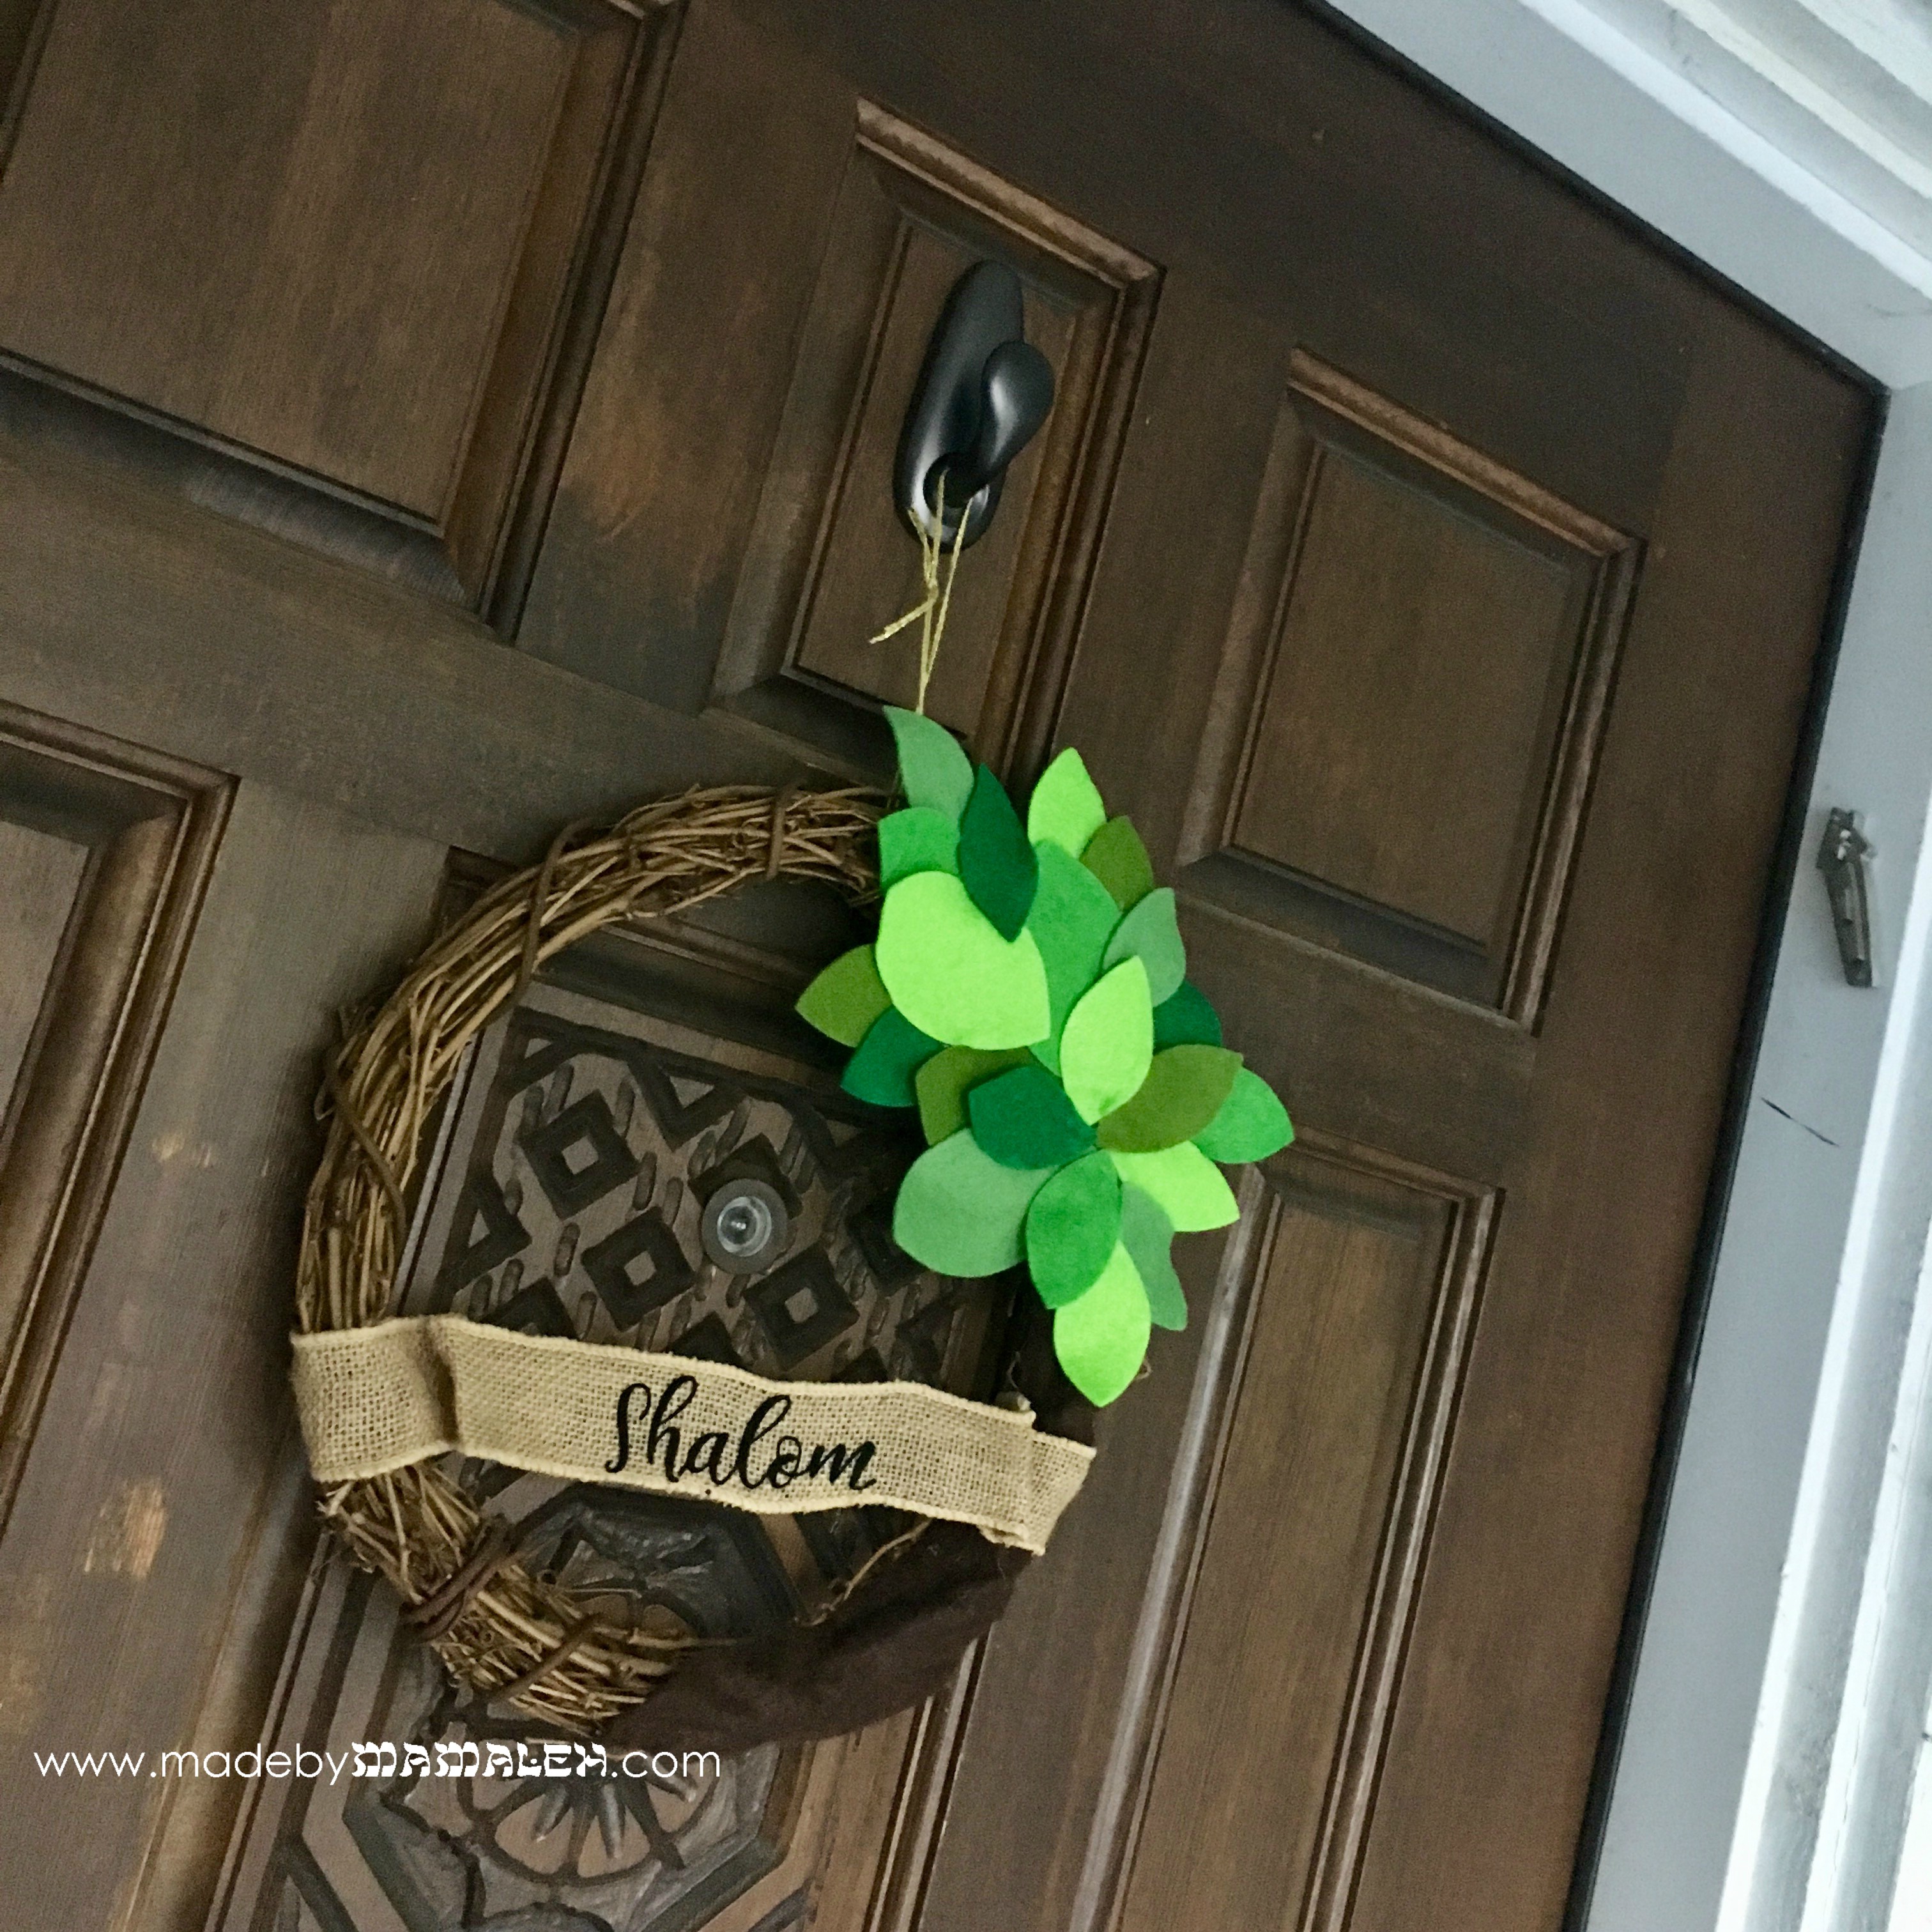
I had so much fun creating the dreidel wreath for Hanukkah and have decided that my door now feels naked without a wreath smiling at me when I arrive home. So, I had a fun idea for a Tu B’Shevat wreath that really could work any time of year! I’ve said it before but I will say it again, Tu B’Shevat is one of those holidays that without a Jewish calendar staring you down or a kid in religious school, you might not give it much thought. It’s basically the new year of the trees, a Jewish celebration of the environment and it has some beautiful traditions but you can acknowledge it in a subtle way like creating a piece of kid tree art or even giving a silly gift like I have in the past.

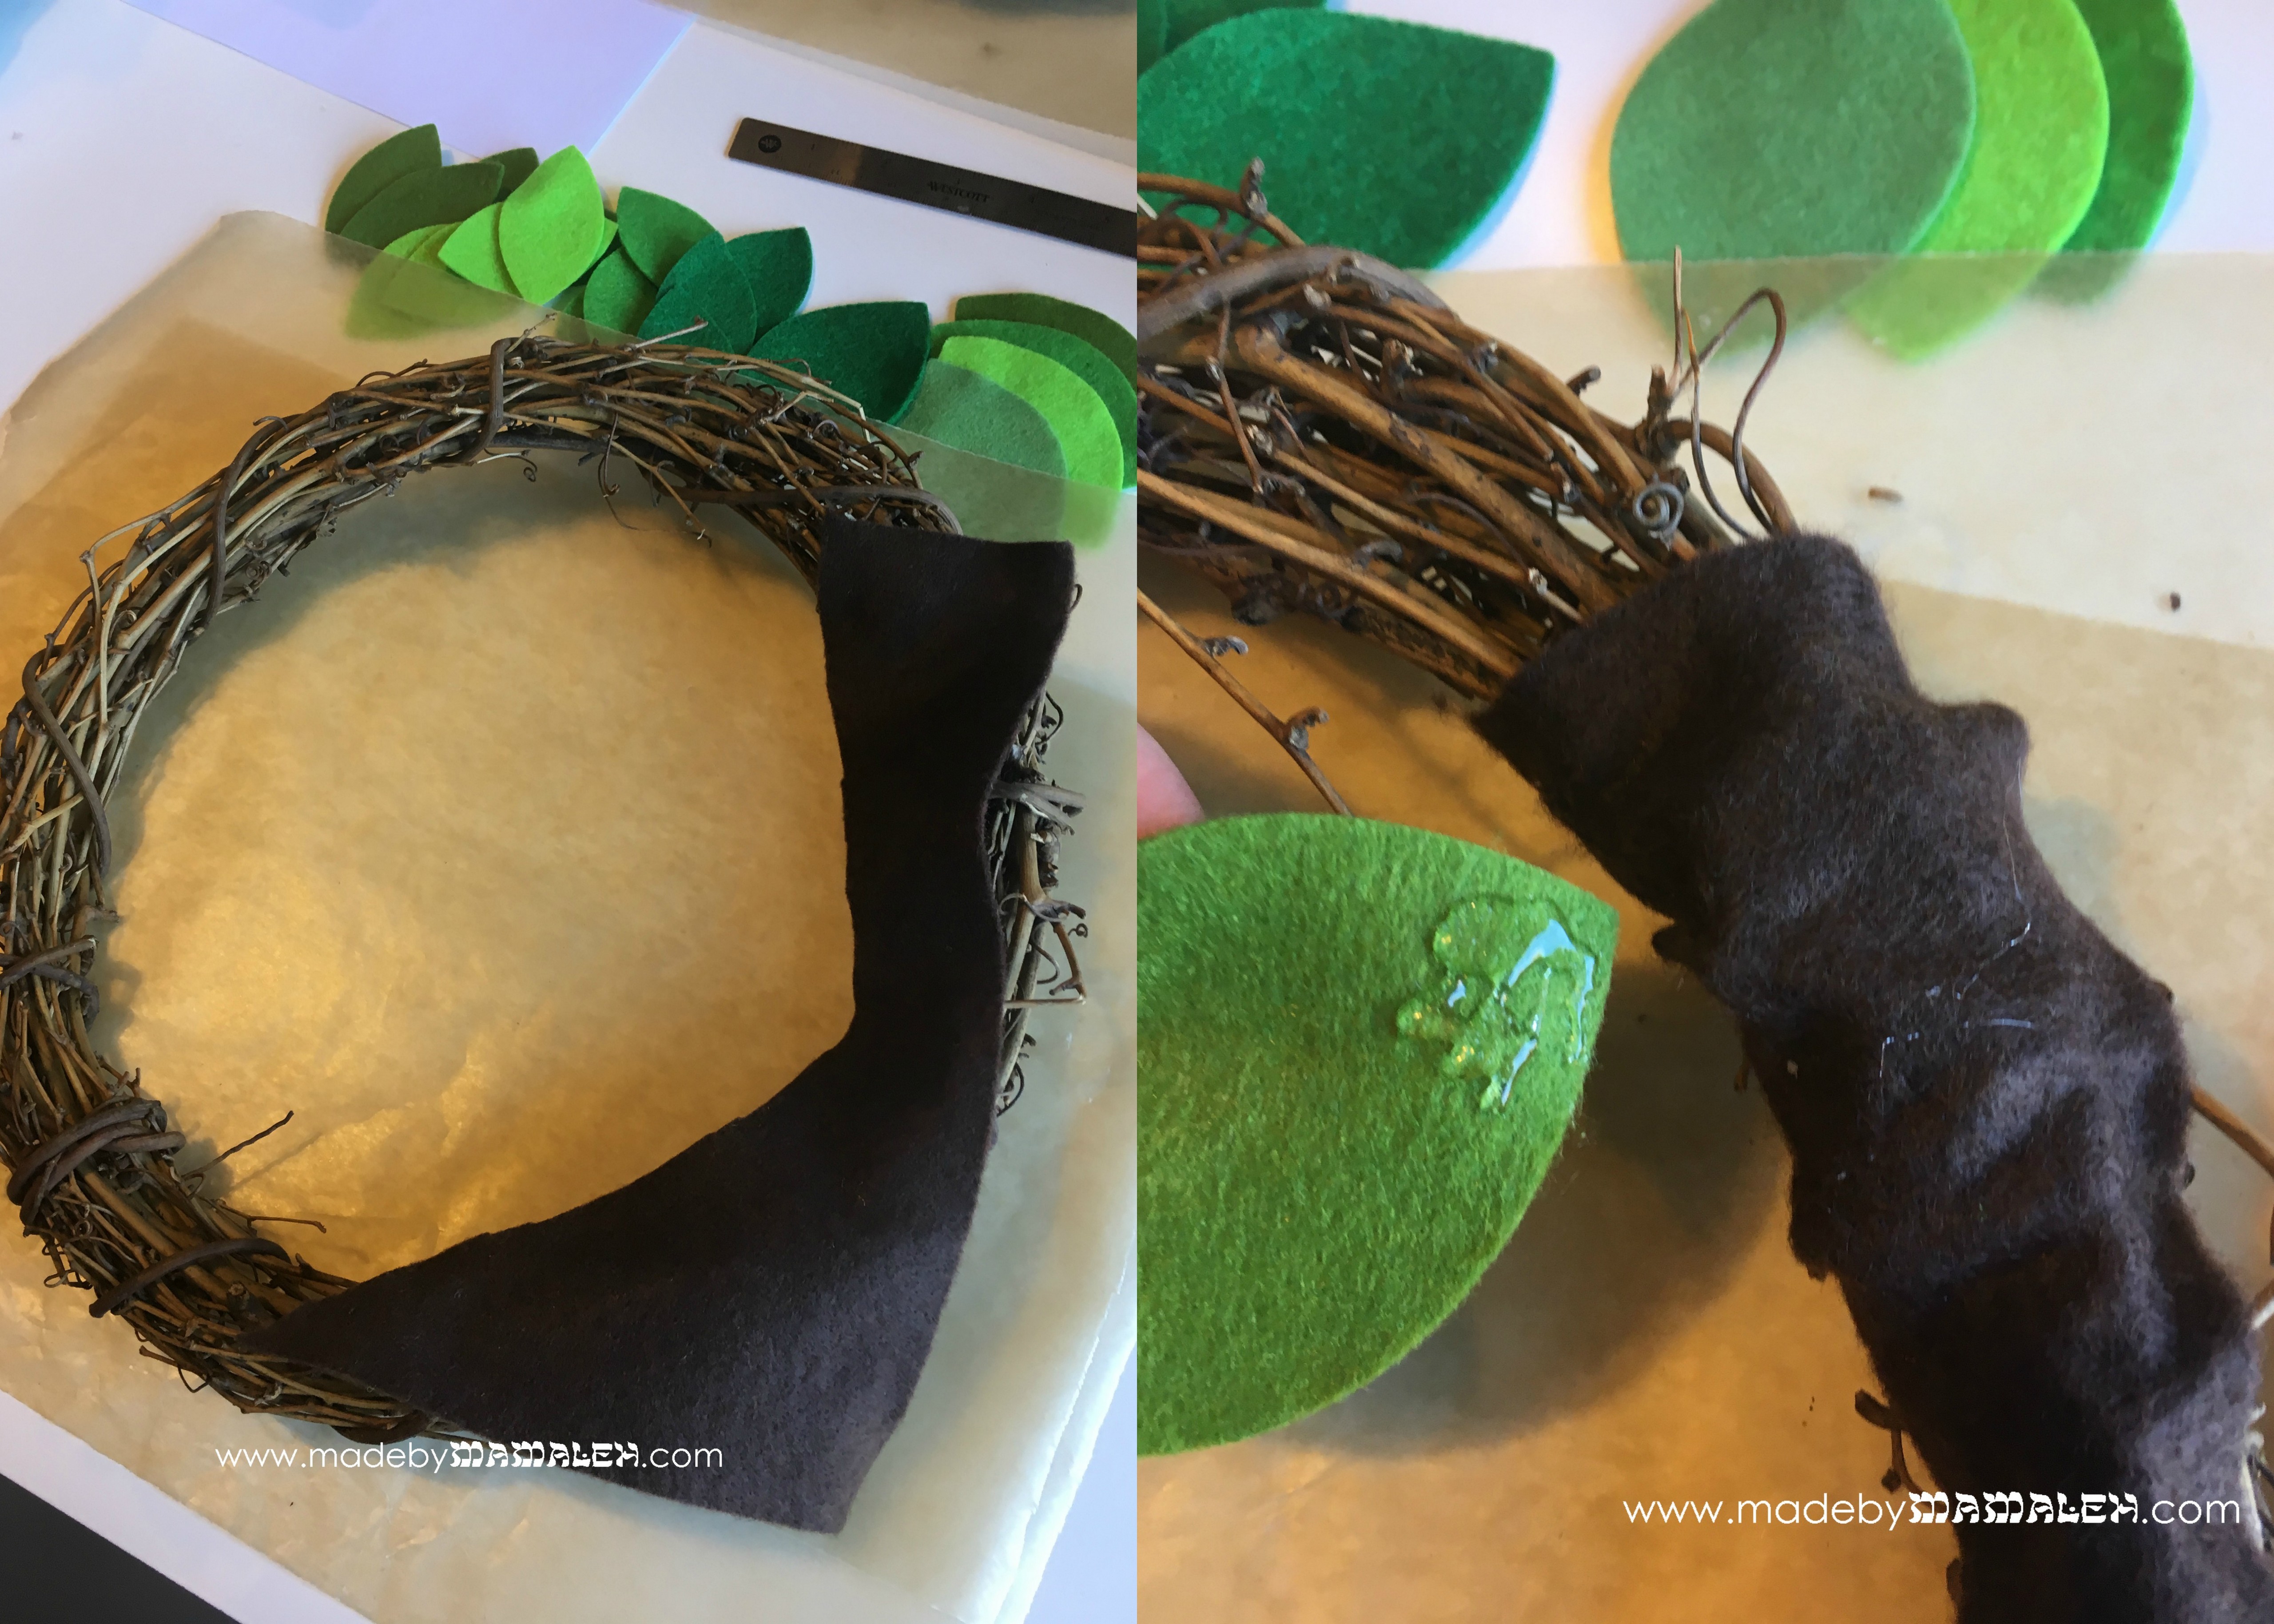
For this wreath, I once again had a good crafting sesh with one of my besties. We started with a couple of grapevine wreaths for that tree look we were going for. Next, we picked an array of green felt in various hues from this felt multipack. Using a big leaf die that cuts out two sizes of leaves, we ran it through the Big Shot, cutting each color using the full die and then just the smaller leaves two more times. So, in the end we each ended up with one large leaf of each color and three smaller leaves of each. Of course, you could use whatever sort of combination that you wanted to create whatever your tree vision might be.

After the leaves were cut, we free-handed a “trunk” out of one of the sheets of dark brown felt. Next, we were ready to glue. Because the grapevine wreath has so many openings between the branches, we were sure to put down some wax paper before starting the gluing process. Using hot glue guns, we first glued down the trunk, pressing it into the wreath on one side. Then, working leaf by leaf, putting glue only on the bottom corner so as to leave the tops free, we arranged our leaves to form a tree.
Next, using wired burlap ribbon, we created a “banner” to be applied across the width of the wreath. My original plan was to stamp a sentiment using fabric ink. I tried this with a couple of different sentiment stamps and ink colors and it just did not look right as it did not fit the boldness of the design.
 So, back to the drawing board, we decided to cut out the word “Shalom” from flocked iron-on vinyl using my Silhouette Cameo and then ironed it on the ribbon. This worked much better! Using this method, you could even choose to write in Hebrew. After ironing-on Shalom, we then wrapped the ends around the wreath and then held them in place with hot glue. After attaching a little gold twine hanger, up on the door it went and I couldn’t be happier with it! Happy Tu B’Shevat!


Pingback: Welcome To Craft Schooling Sunday! - Creative Jewish Mom