

Serious Crafters have hoarder-like tendencies when it comes to their supplies. The latest rubber stamp, paper, ribbon, or obscure gadget, will simply call to you and you have no choice but to add it to your stash. I used to think I was alone. Now I know better.
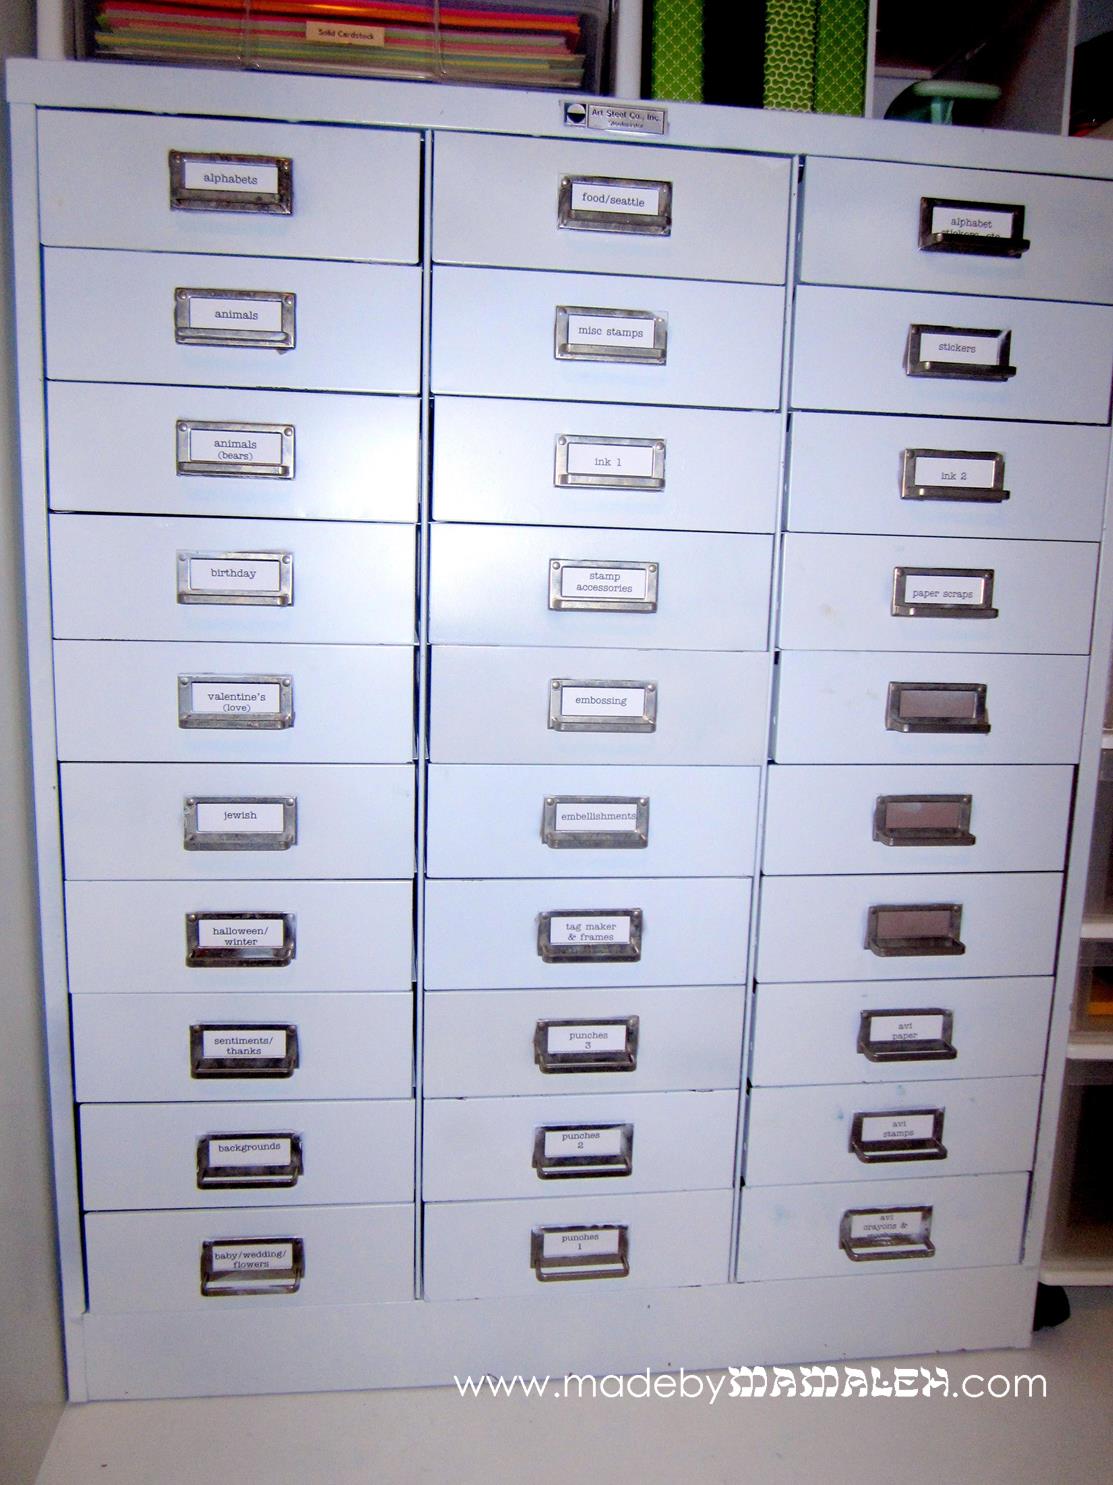
When I first started stamping as a child, my collection of stamps fit nicely in a shoebox but now I am sort of embarrassed to admit the amount of real estate they take up in my craft room. I was lucky enough to inherit the same steel drawer unit my grandmother used to store her stamps which is now home to all my stamps and various stamping accessories. It’s one of those things that makes you say “they don’t make ’em like they used to” with its sturdy (i.e. insanely heavy) steel frame and 30 little drawers. The original color was “industrial office furniture putty” which you can still see showing through where I have yet to put labels. The bulk of it I spray painted to go along with my white and green craft room. If/when my craft room is tidy, I still owe you a tour.
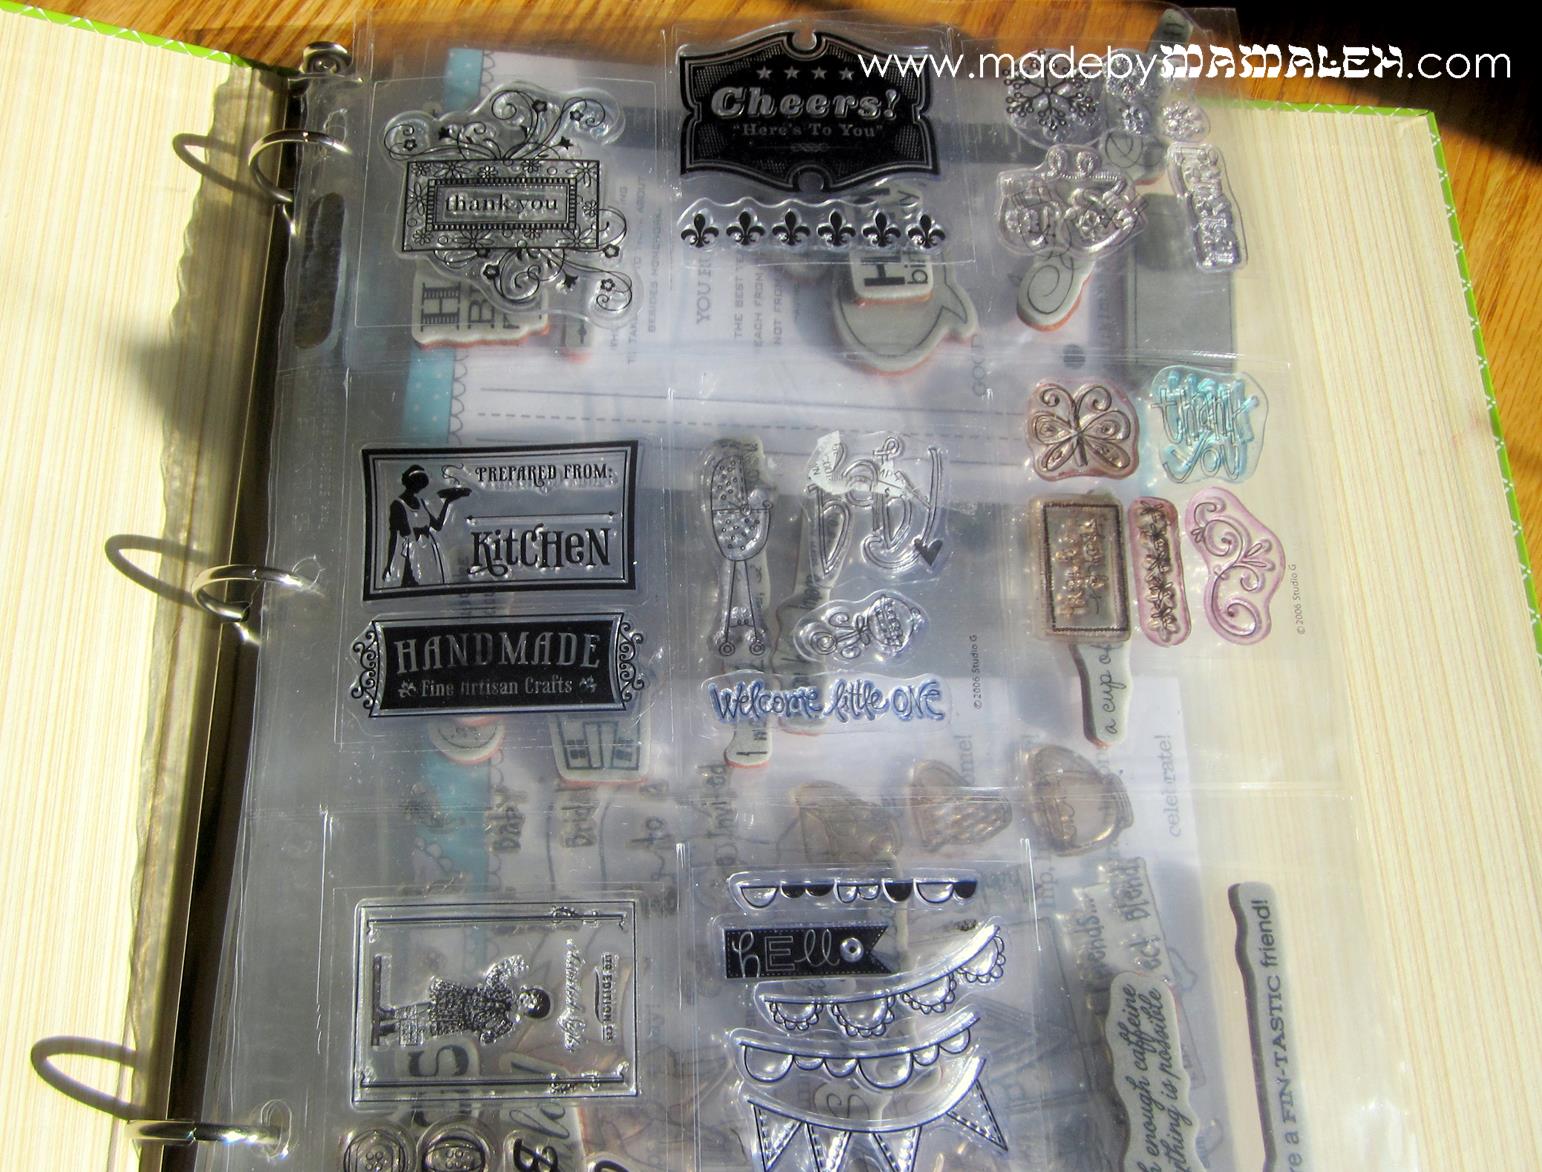
The steel drawers help with all of my wood-mounted rubber stamps, but in this era, I certainly have my share of clear and cling stamps as well. I store these types of stamps in a series of cute binders using either baseball card sheet protectors for the smallest ones, 5×7 sheet protectors for medium ones and full size sheet protectors for the rest.
So I am doing pretty well on storage, but what I started realizing was that it was still hard to keep track of all the different stamps, especially sentiments and I could never find exactly what I was looking for or at least not quickly. On several occasions I accidentally purchased duplicates or items that were quite similar. I discovered I wasn’t the only one with this problem. I devised a way to catalog all of my stamps that would give me flexibility when I got new ones but be easy to look through and scope out my latest project. Enter my own personal stamp catalog.
I cut a good size stack of white cardstock to 8.5″ x5.5″ to fit a binder of the same size (small enough to tote with me to the stamp store). The binder is great because it has a little pocket for storing extra tabs or a mini ruler. I even created a little card size guide to keep at the front for easy reference. Click here to download your own.

Matching page protectors mean I can slip the sheets in and out when I have a new stamp to add to the collection. I used removable adhesive tabs to create the categories (which correspond to the labels on the drawers)- the ability to move these around is great in the event you realize you’ve suddenly amassed a whole new category of stamps. I recommend using a fine point Sharpie to write on them so it doesn’t smear. And then I got to stamping – for fast drying and good definition, I used Versafine Onyx Black to stamp each image. Underneath each one I wrote the manufacturer as well as the name of the stamp (if it has one) and if it is clear or cling, I put a little “c” in parentheses so I know to check my binders.


 It took a long time to get everything in but once I did, it has made using my stamps so much more enjoyable. I can hold images up next to each other to see how they look together or hold them up next to a card or die. And I can’t tell you how many times I have saved myself from buying something I already had! I decided to include ink, embossing powder and stickles too since I have the same trouble with all of these. It’s like shopping in my craft room every time I pull it out and is just so satisfying especially since it is totally neat and tidy while my desk is a crafty disaster. I had it with me on Saturday when I took two fabulous card classes at Impress with the amazing Julie Ebersole and had a few admirers so figured it was time to share with the world (I took the pictures like a year ago and just hadn’t gotten around to writing out all the details)! Hope it inspires you to organize your stash!


Pingback: Elul and Gratitude | madebymamaleh
Pingback: A sweet and simple Shana Tova | madebymamaleh
YAY!!! *monkey clapping* So glad you blogged your amazing notebook!!! You did such a fab job on it–I need to get in gear and make one, too–would certainly help with those…”duplicate” *cough*cough* purchases… LOL! 😉 *hugs* Thanks for sharing it, chica!
LikeLike
Aw shucks Julie! Thanks! And thanks for such inspiring classes last weekend! Can’t wait for the next one!
LikeLike
YAY!!! *monkey clapping* I’m so glad you blogged it, because it’s an amazing tool and you did such an awesome job–I’m jealous!!! And, I should make the time to do the same because it would certainly help prevent those… ahem, “duplicate” purchases… *cough*cough*cough* 😉
LikeLike
Thanks for the useful tips. I am having difficulty finding Judaica inspired stamps. Could you share some of your sources please?
LikeLike
Jewish stamps are so hard to find – one of the best sets out there is this one from Paper Trey Ink:
https://www.papertreyink.com/stamps/mazel-tov-stamp-set/
and the matching mini set:
https://www.papertreyink.com/stamps/mazel-tov-additions-mini-stamp-set/
Another great place to find them is 1-800-Dreidel:
http://www.1-800-dreidel.com/rubberstamps.aspx
Aside from that, I just keep my eye out for them wherever I buy stamps since you never know when you will find one that strikes your fancy. I also periodically do searches on ebay for “jewish stamps” “hanukkah stamp” and “hebrew stamp,” just be sure to limit them to craft supplies since you’ll get a lot of postage stamps too. Also, consider using other stamps for a Jewish themed card, e.g. apples for Rosh Hashanah, a single birthday candle to create a hanukkah card, etc. Hope that helps!
LikeLike
Very nice tip on how to organize stamps. I’ve been debating on whether to store mine in binders or in a file cabinet.
LikeLike